Rev2 Voice Expansion Kit Installation Instructions
Installing the voice expansion board in the Prophet Rev2 is easy, and only requires a few basic hand tools.
Tools needed: Phillips head screwdriver, a 1/4″ nut driver (a small crescent wrench will work too), and some soft padding like bubble wrap or a towel.
Getting inside the Prophet Rev2:
Note: these pictures show the procedure for the keyboard version. The steps for installing in the module version are almost identical.
1. First, unplug all power/MIDI/USB/audio/pedal cables.
2. Remove the 3 screws from each of the wooden sides.
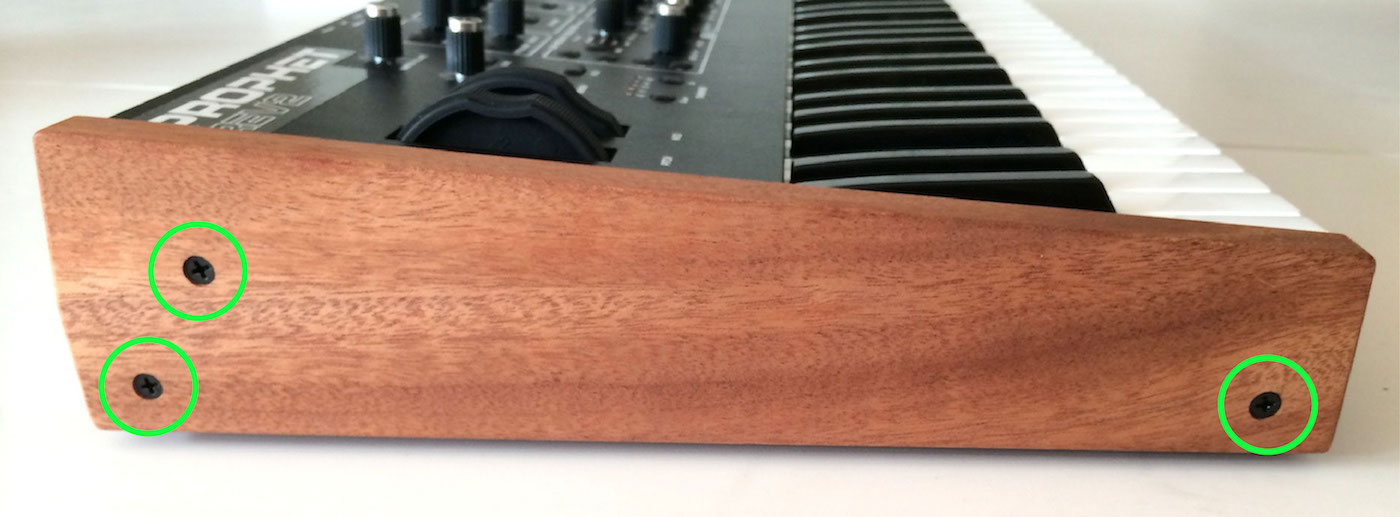
Left Wooden Side
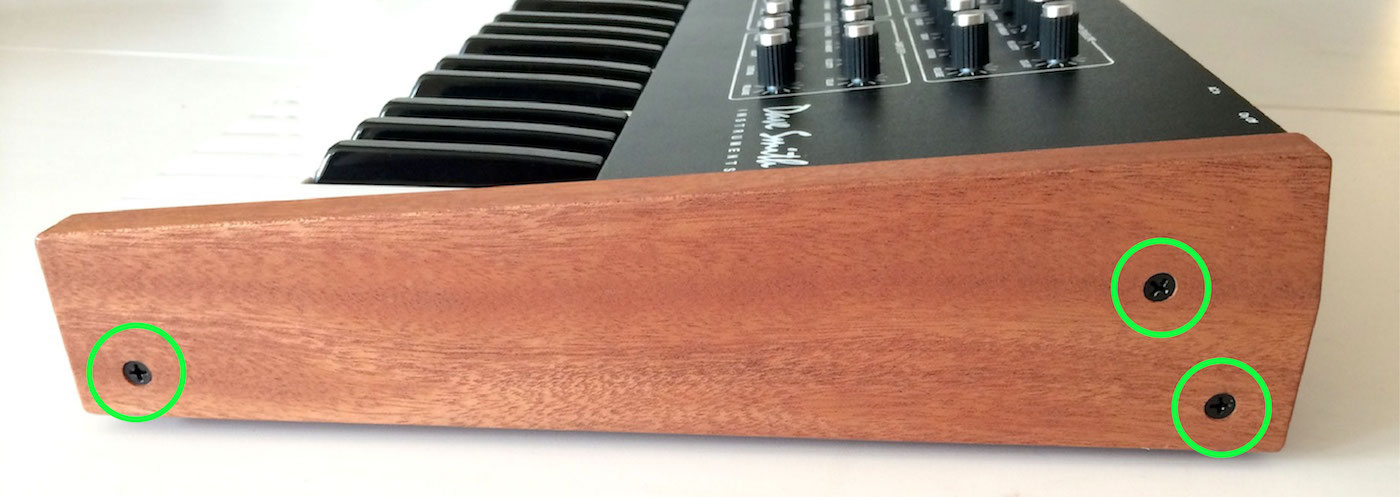
Right Wooden Side
3. Underneath each wooden side, remove the 1 remaining screw from the metal.
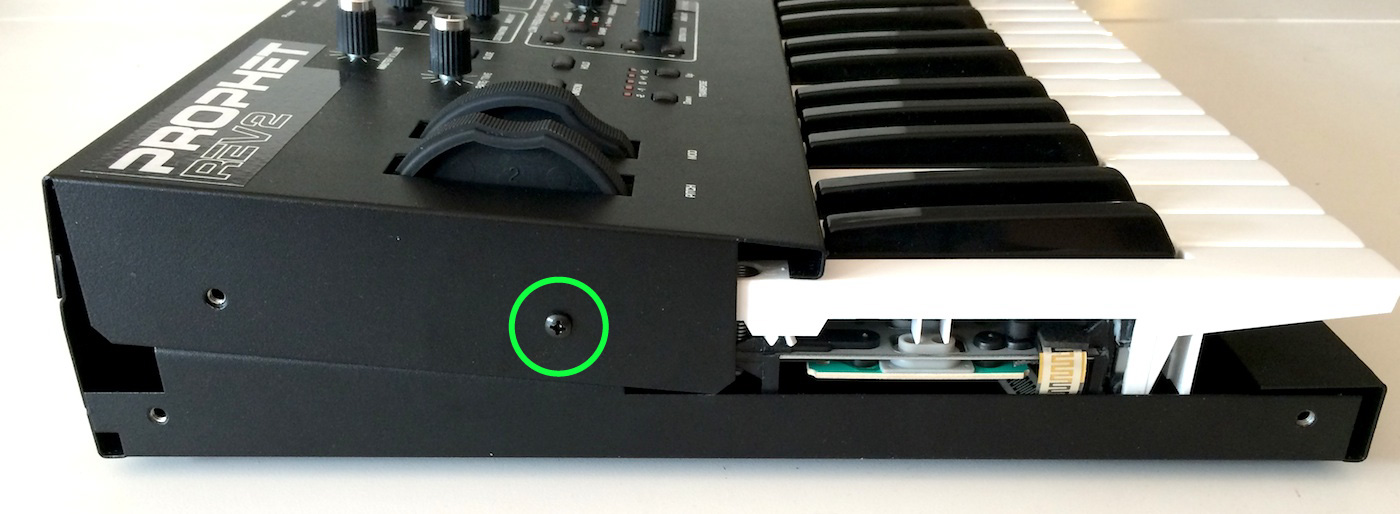
Left Side Screw
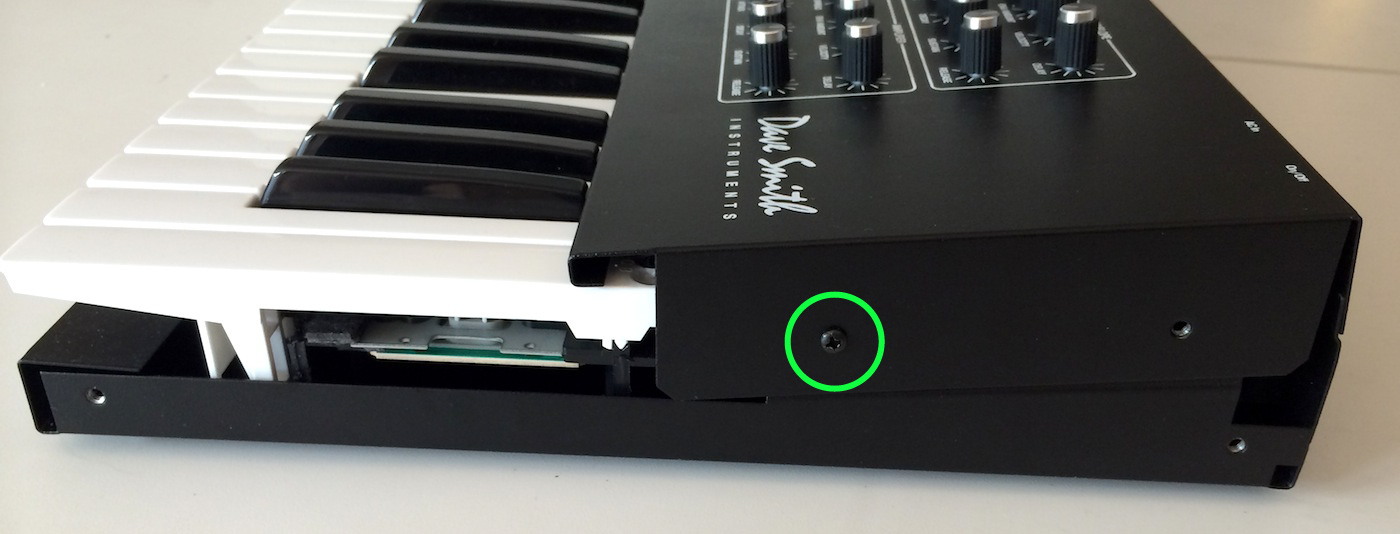
Right Side Screw
4. Now remove the 8 screws across the back panel.
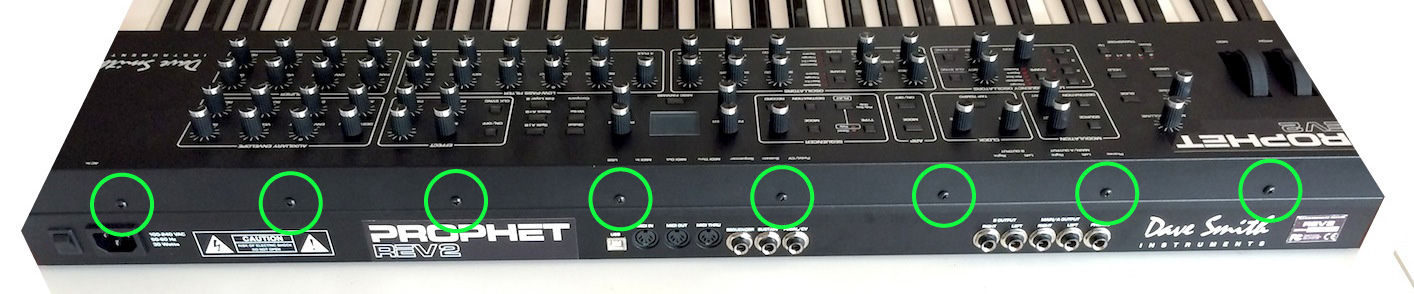
Rev2 Back Panel
5. Place a piece of soft material behind the Prophet Rev2, such as bubble wrap, a towel, blanket, etc…
6. The top panel is connected to the mainboard with a ribbon cable. Lift the Prophet Rev2’s front panel up and off the unit. Place it face down on the soft material behind the Prophet. The ribbon cable does not need to be removed.
Installing the voice expansion board:
1. The Rev2 mainboard is sitting in the tray above the keybed. To install the voice expansion board, we’ll need to remove 2 screws from the mainboard and replace them with the standoffs included in the Voice Expansion Kit. Remove the screw in the lower left corner and the screw in the center-right of the mainboard, just above the rightmost empty connector socket.
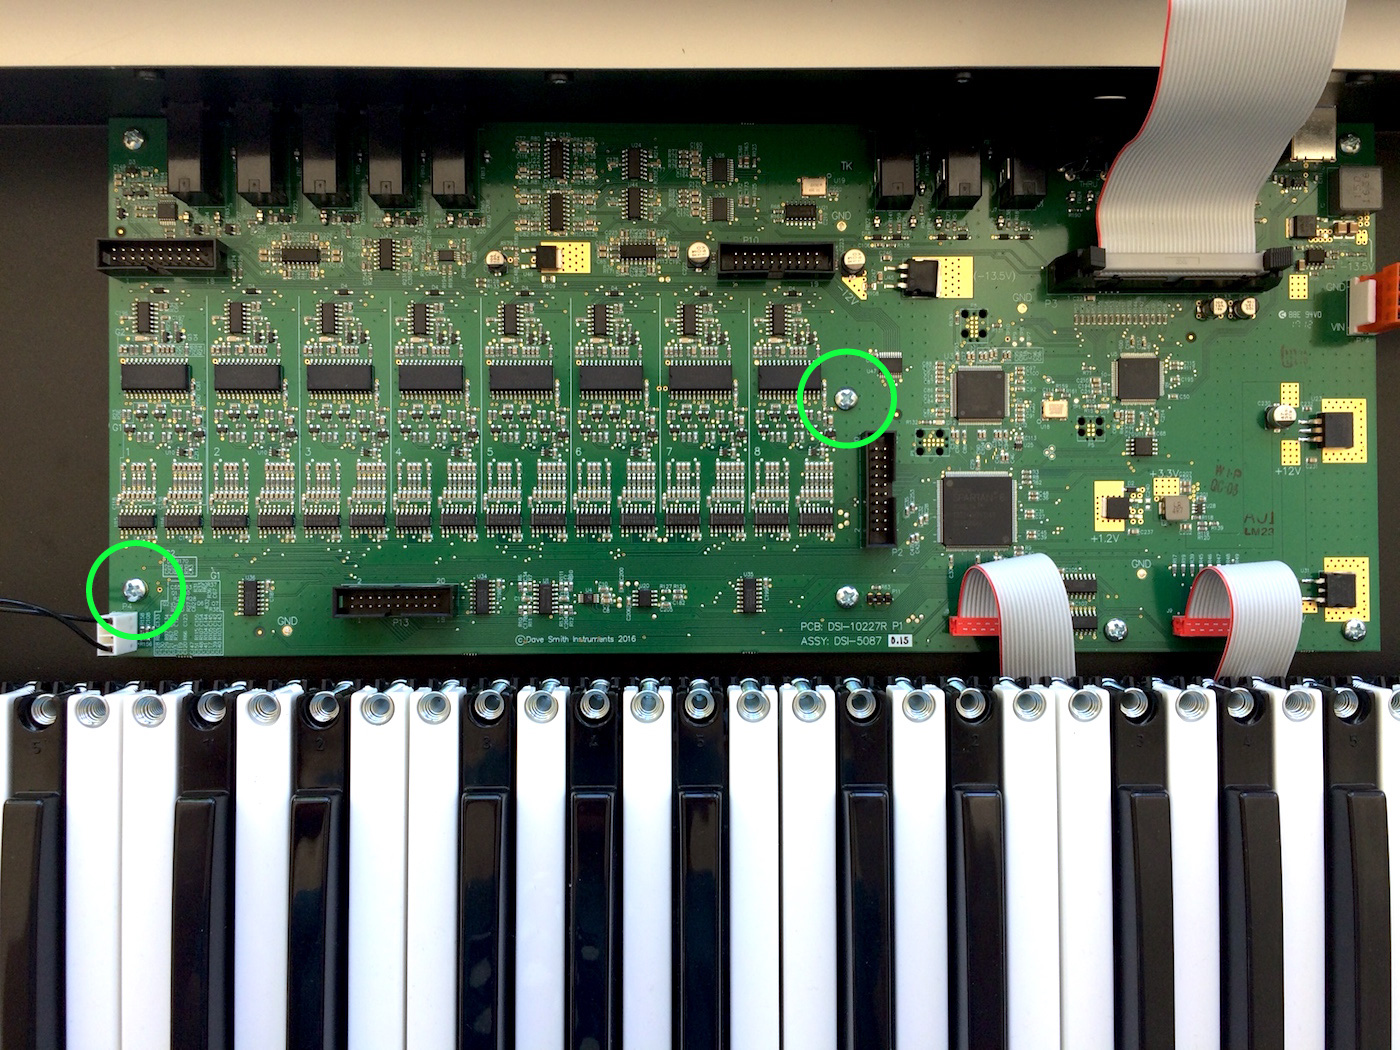
Rev2 Mainboard
2. Using a 1/4″ nut driver or a small crescent wrench, install the standoffs in the locations of the 2 screws that were just removed. Use light to medium force only.
*IMPORTANT*: The standoffs are soft metal and they can be damaged if too much force is applied. DO NOT over-tighten.
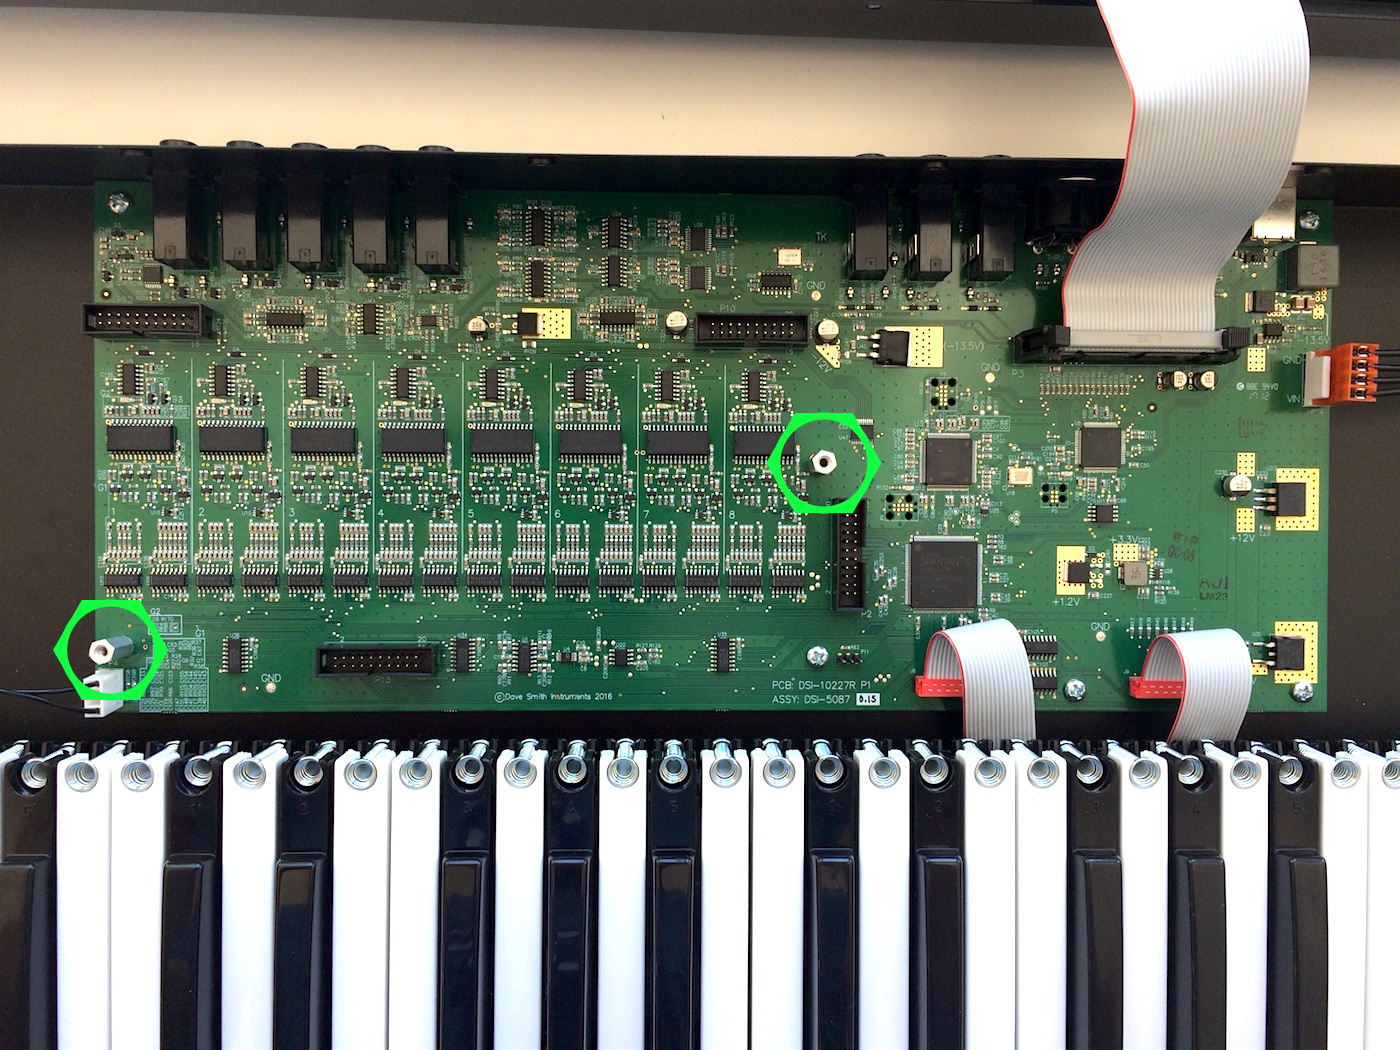
Rev2 Voice Expansion Standoffs
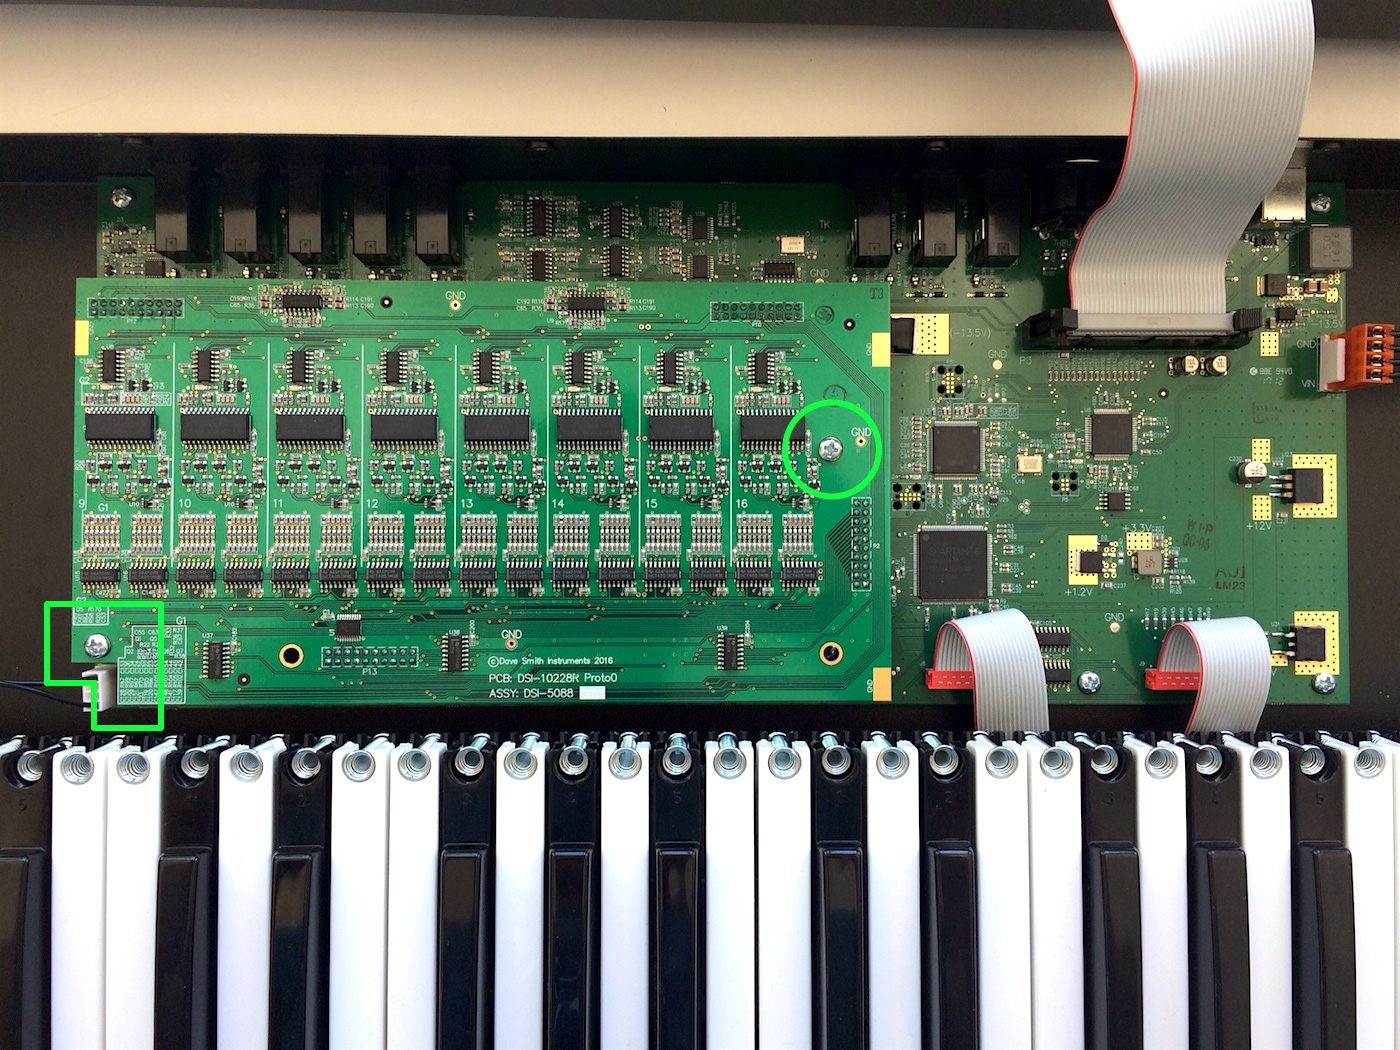
3. With the standoffs installed, orient the voice expansion board so the corner cutout is in the lower left. Align the 4 connectors on the bottom of the voice board with the 4 black sockets on the main board. Press the voice board into place with medium force, pressing on the voice board itself near each of the connector locations. Install the 2 screws that were removed in step 1 to secure the voice expansion board.
Rev2 Voice Expansion Board
4. Set the top panel back onto the Rev2. Before reassembly, plug in the power cable and turn on the Rev2. The display should read “REV2 | 16 Voice”. If it does not display “16 Voice”, go back to step 3 and ensure all 4 connectors on the voice board are properly aligned in their sockets.
Reassemble the Prophet Rev2 in the reverse order.
Please contact DSI Technical Support if you have any questions regarding this procedure.