Prophet-5 Voice Expansion Kit Installation Instructions
Installing the voice expansion board in the Prophet-5 is easy, and only requires a couple basic hand tools.
Tools needed: Phillips head screwdriver, and a 1/4″ nut driver (a small crescent wrench will work too).
You must upgrade to Main OS 2.0 or higher prior to installing the voice expansion board.
Find the latest OS here: https://sequential.com/updating-the-prophet-5-10-os/
Getting inside the Prophet- 5:
1. First, unplug all power/MIDI/USB/audio cables.
- Note: Wood is sturdy but delicate, and can be scratched or damaged if you’re not careful. Take your time to ensure your wood remains in pristine condition during disassembly and reassembly.
2. Remove the 6 screws on each of the wooden sides. There are two different types of screw, take care to keep them organized.
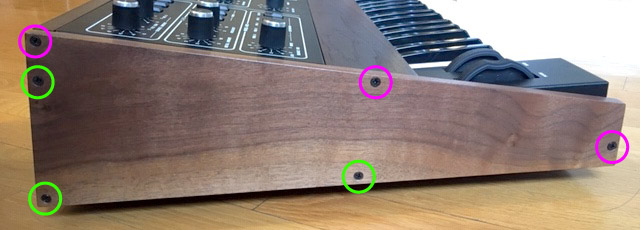
Left Wooden Side
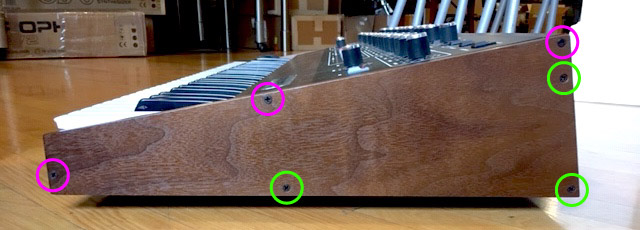
Right Wooden Side
3. Underneath the left wooden side, remove the upper 3 screws from the metal.
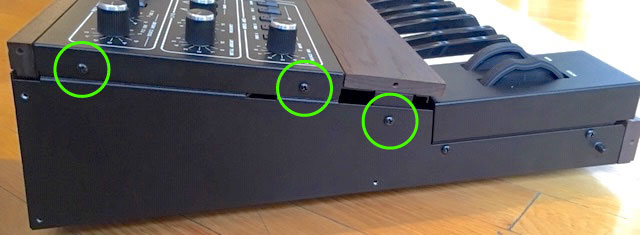
Left Side Screws
4. Underneath the right wooden side, remove the upper 3 screws from the metal.
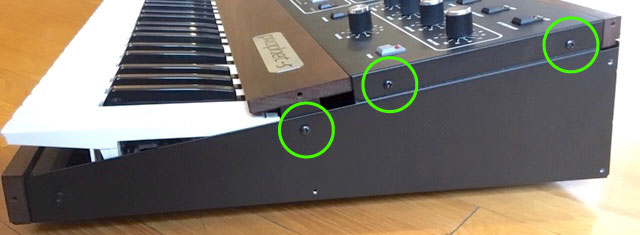
Right Side Screws
You can now lift the lid open from the front. It is hinged and it will stay open with the attached lanyard.
Installing the voice expansion board:
1. The Prophet-5 mainboard is sitting in the tray above the keybed. To install the voice expansion board, you’ll need to remove 3 screws from the mainboard and replace them with the standoffs included in the Voice Expansion Kit. Remove the screw to the right of the empty upper left connector socket, the screw at the bottom center of the mainboard, and the screw just above the rightmost connector socket.
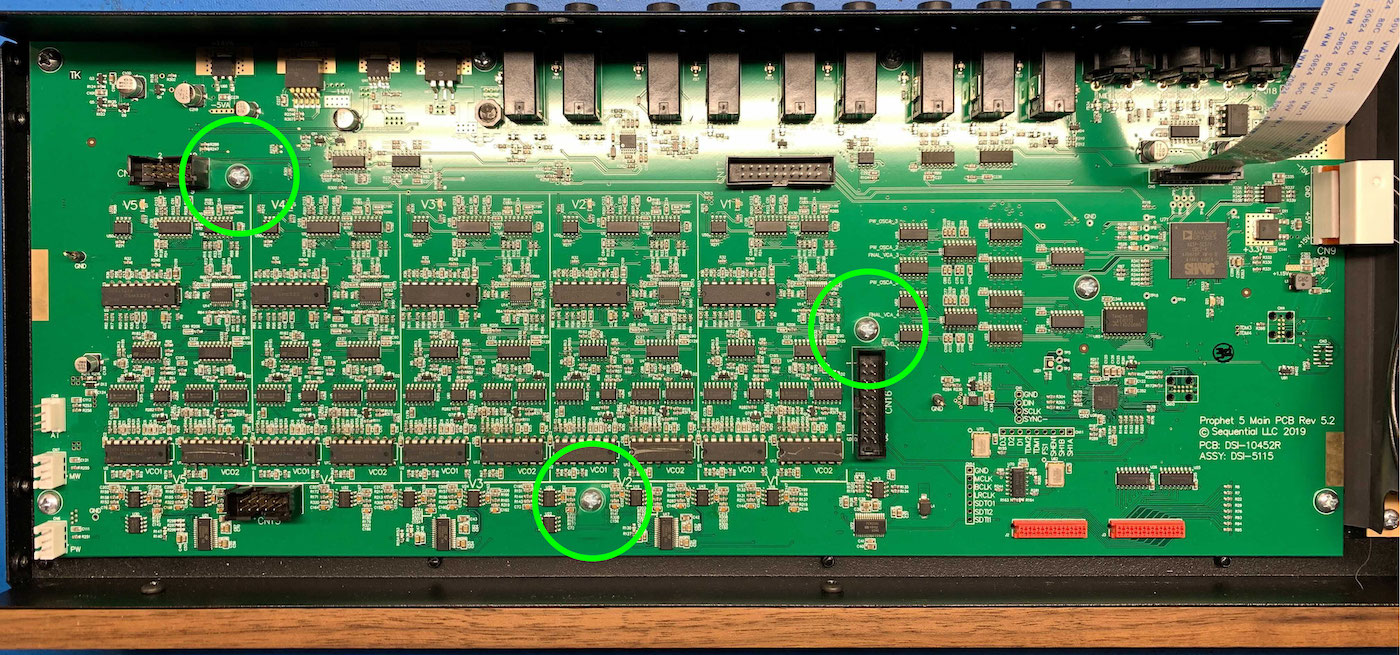
P5 Mainboard Screws
2. Using a 1/4″ nut driver or a small crescent wrench, install the standoffs in the locations of the 2 screws that were just removed. Use light to medium force only.
*IMPORTANT*: The standoffs are soft metal and they can be damaged if too much force is applied. DO NOT over-tighten.
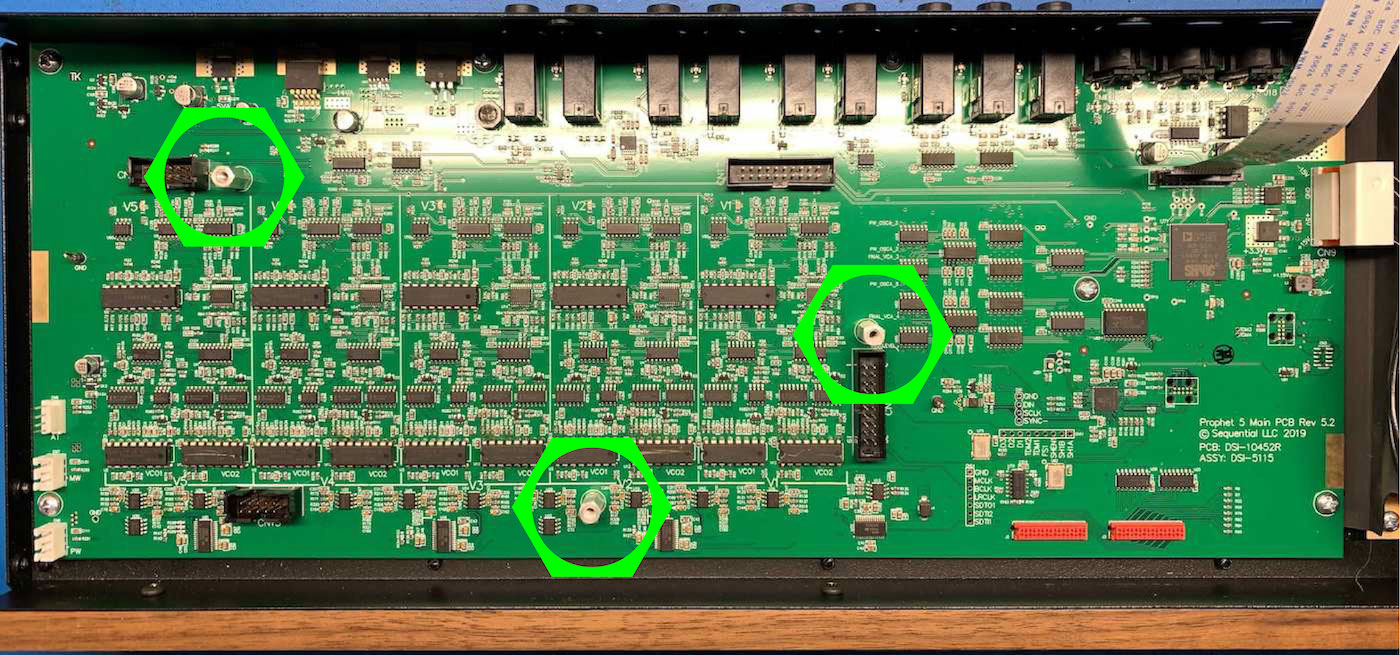
P5 Mainboard Standoffs
3. With the standoffs installed, orient the voice expansion board so the vertical connector is on the righthand side. Align the 4 connectors on the bottom of the voice expansion board with the 4 black sockets on the main board. Press the board into place with medium force, pressing on the voice board itself near each of the connector locations until it’s fully seated. Install the 3 screws that were removed in step 1 to secure the board.
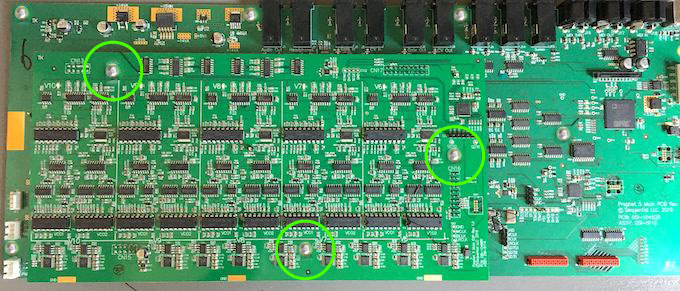
Expansion Board Screws
4. Close the lid. Before reassembly, plug in the power cable and turn on the Prophet. Ensure the voice expansion was correctly installed by checking for stack/split operation. Press and hold Preset, the 7-segment display should show “n0r”. Continuing to hold Preset, press Bank Select. It should display “StC” for stack. Pressing Bank Select again should display “SPL” for split. Press Group Select twice to return to normal mode.
If you are not able to access stack and split modes, go back to step 3 and ensure all 4 connectors on the voice board are properly aligned in their sockets.
Reassemble the Prophet in the reverse order:
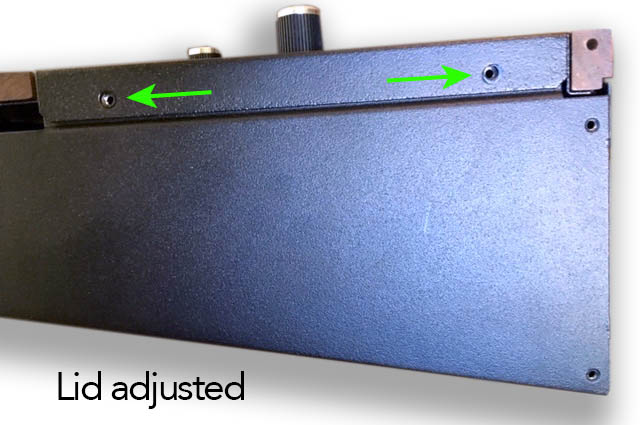
1. The top panel tends to lay a little too far forward when at rest. While the screws will still go in, the wood may be slightly out of alignment without some attention to detail.
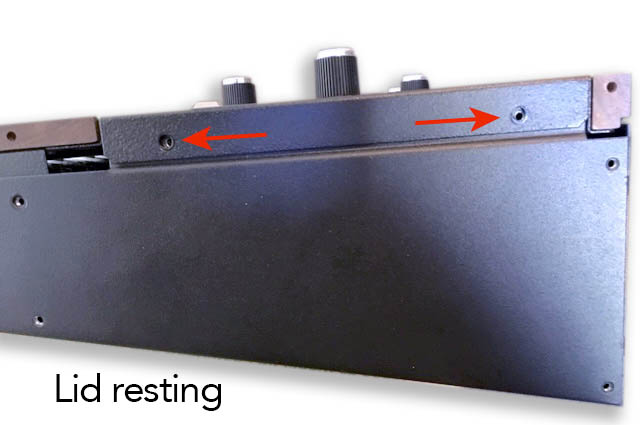
2. Take care to center align the top panel screw holes with the threads in the bottom panel. For the rear screw, this often means pushing down on the top panel or squeezing the top and bottom panel together with one hand while inserting and tightening the screw with the other. As long as it’s aligned front-to-back, the other two holes should also be aligned.
3. Pay attention to the vertical orientation of the hole and keep it centered on the threads. If pushed too far down, the wood may not align properly.
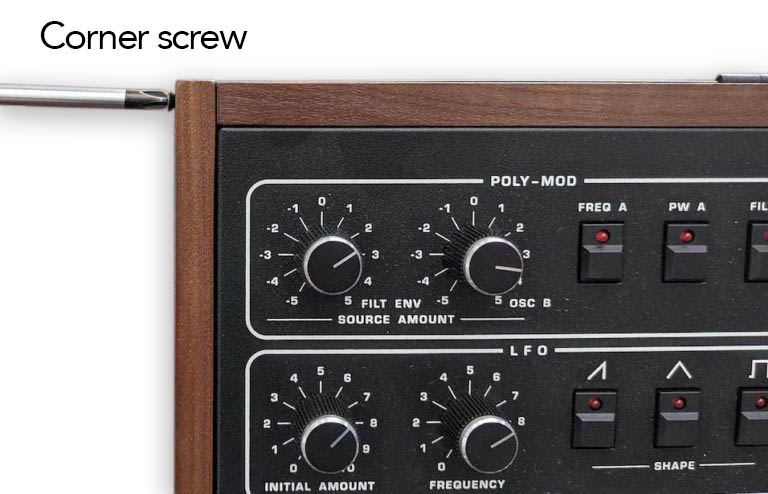
4. When reinstalling the wood sides, put the top rear screw in first and align that corner with the wood trim.
5. If, in step 2, you pushed/squeezed the top panel down too far, the second screw down in the rear doesn’t align with the threads in the metal. One way to check that is by looking at the gap in the back between the hinge and the ends. It should be the same width (top to bottom) all the way across. Typically, it’s wider at the ends of the instrument, so when you push/squeeze it together it evens out. But it is possible to squeeze it too much which results in the gap being narrower at the ends.
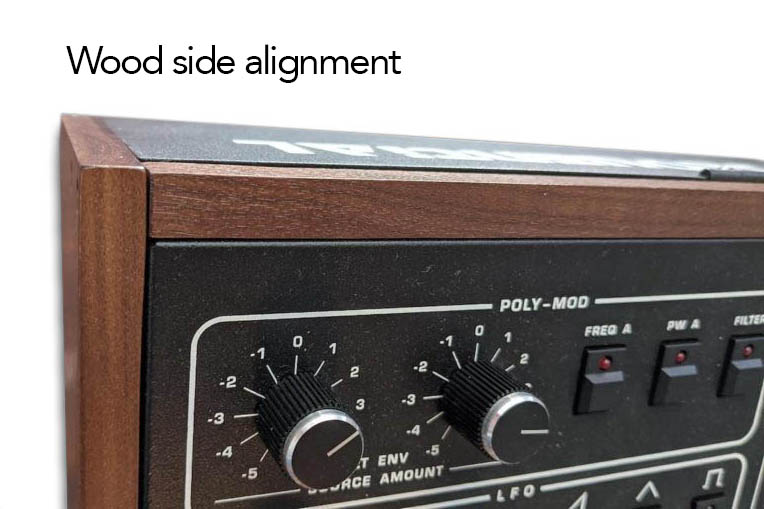
6. After that, any order for the remaining screws will work. Position the front edge of the side panel as flush to the font wood trim as you can.
Recalibrating the oscillators and filters:
1. After adding the voice expansion board, your new Prophet-10 should be recalibrated. Plug in the power cable and turn the unit on.
2. Press and hold the Record switch, and while holding press Tune. This resets the calibration table. Recalibrate the unit by pressing the Tune button.
- Note: The calibration table will need to be repopulated at various temperatures before the instrument feels like it’s not “going out of tune”. We recommend tuning immediately after power up when it’s cold, again as it warms up, and again when it’s been on for several hours in your normal working environment. In short, press Tune anytime the instrument sounds out of tune or when you bring it to a new location, and before long you’ll rarely have to tune it again.
Please contact Sequential Technical Support if you have any questions regarding the above procedure.