Prophet-5 & Prophet-10 Key Replacement Guide
Removing or replacing a key in the Prophet-5 and Prophet-10 Keyboard is an easy procedure, requiring little more than a screwdriver.
Tools needed: Phillips head screwdriver, needle-nose pliers.
Getting inside the Prophet- 5 & Prophet-10:
1. First, unplug all power/MIDI/USB/audio cables.
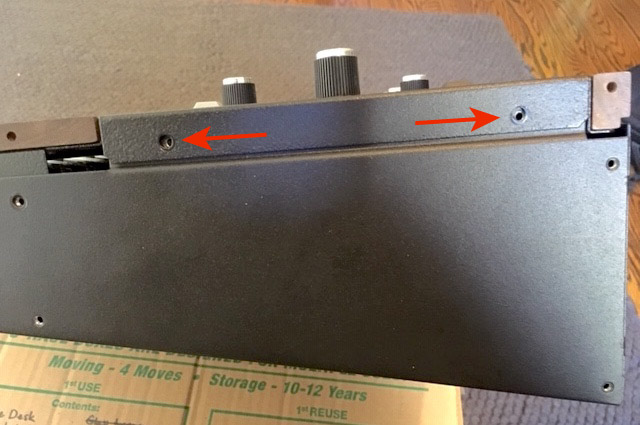
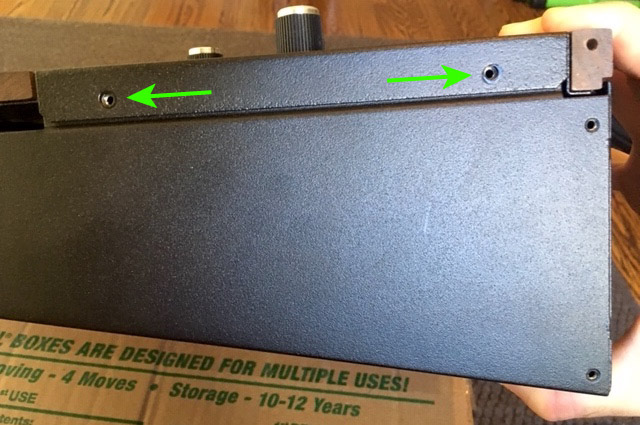
2. Now unscrew the 6 screws on each of the wooden sides.
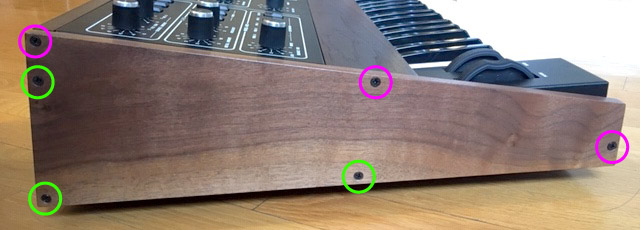
Left Wooden Side
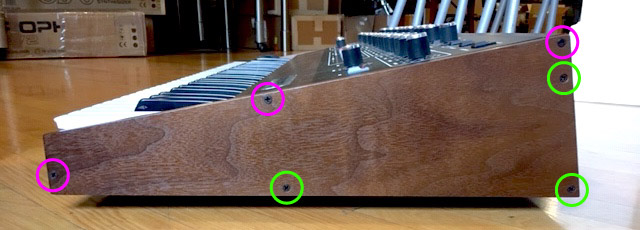
Right Wooden Side
- Note: There are two different types of screw, take care to keep them organized.
3. Underneath the left wooden side, unscrew the upper 3 screws from the metal.
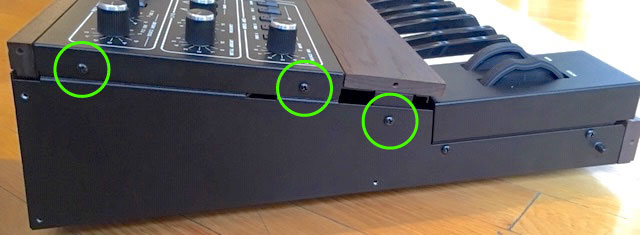
Left Side Screws
4. Underneath the right wooden side, unscrew the upper 3 screws from the metal.
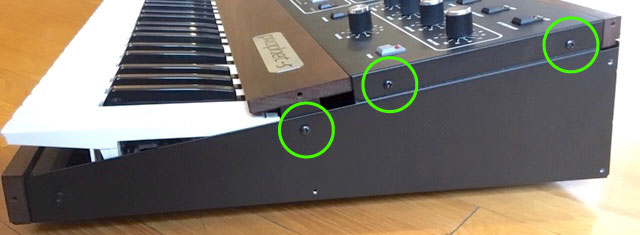
Right Side Screws
You can now lift the lid open from the front. It is hinged and it will stay open with the attached lanyard.
Removing or replacing a key:
1. The keys on the Prophet-5 & Prophet-10 are held in place by the key spring at the back of the key and by a plastic clips integral to the sides of the key near the back. To release the key spring, grasp the upper coils with needle nose pliers and pull it straight up, just until the wider coils are clear of the top of the key.
- Note: Prophet-6 interior shown; key removal procedure is identical.
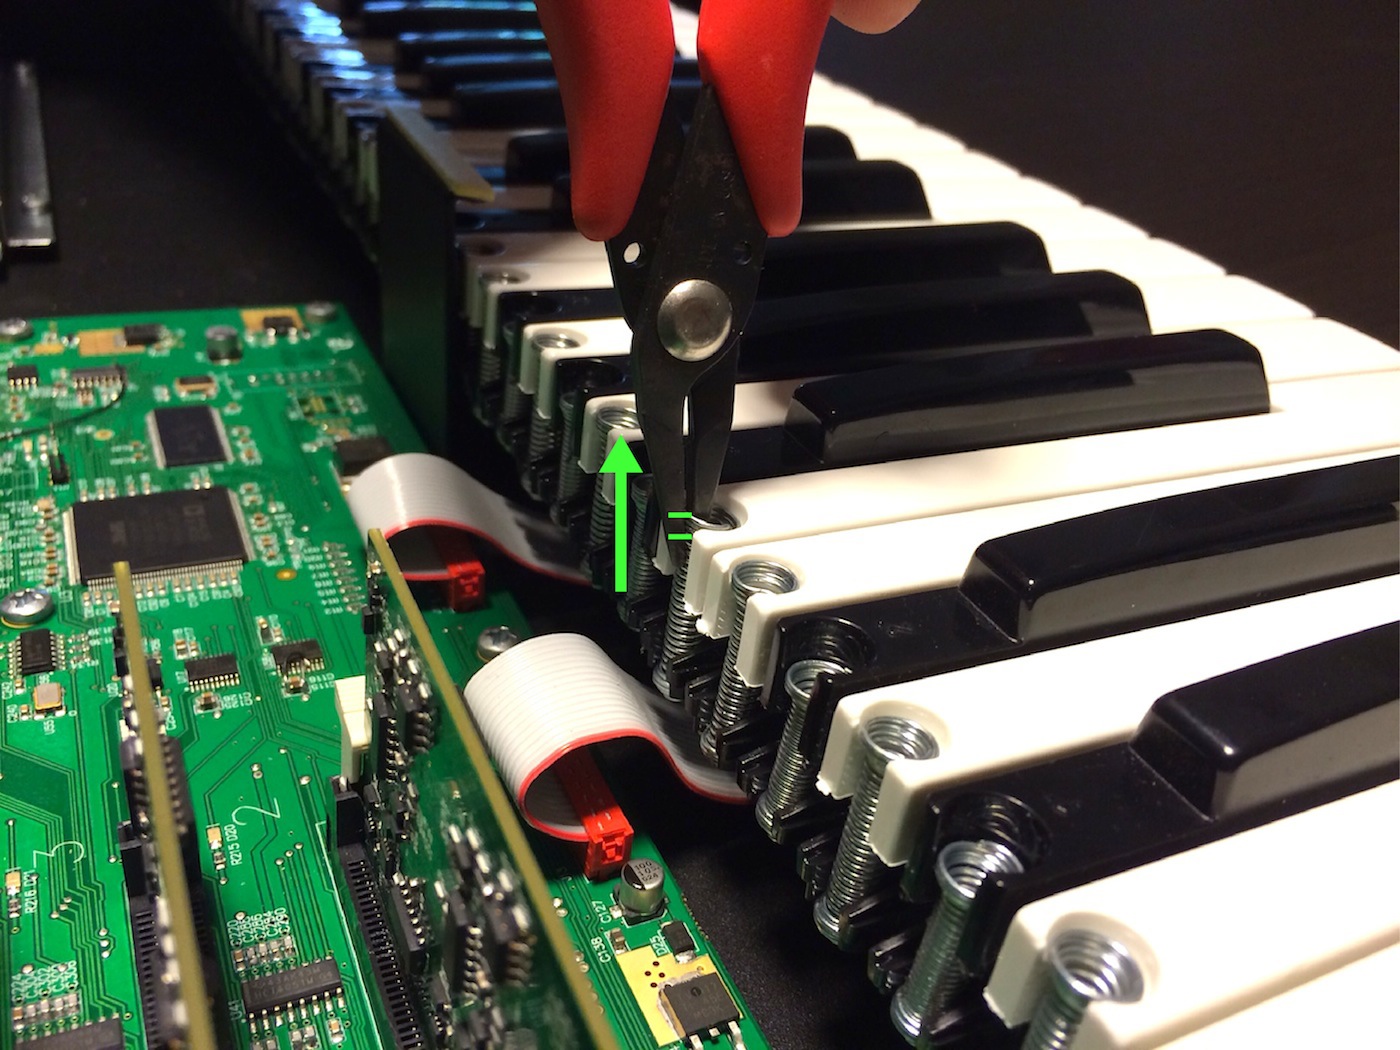
Key Spring
2. Now pull back, moving the spring out of its retainer cup. Relax the spring and set it aside.
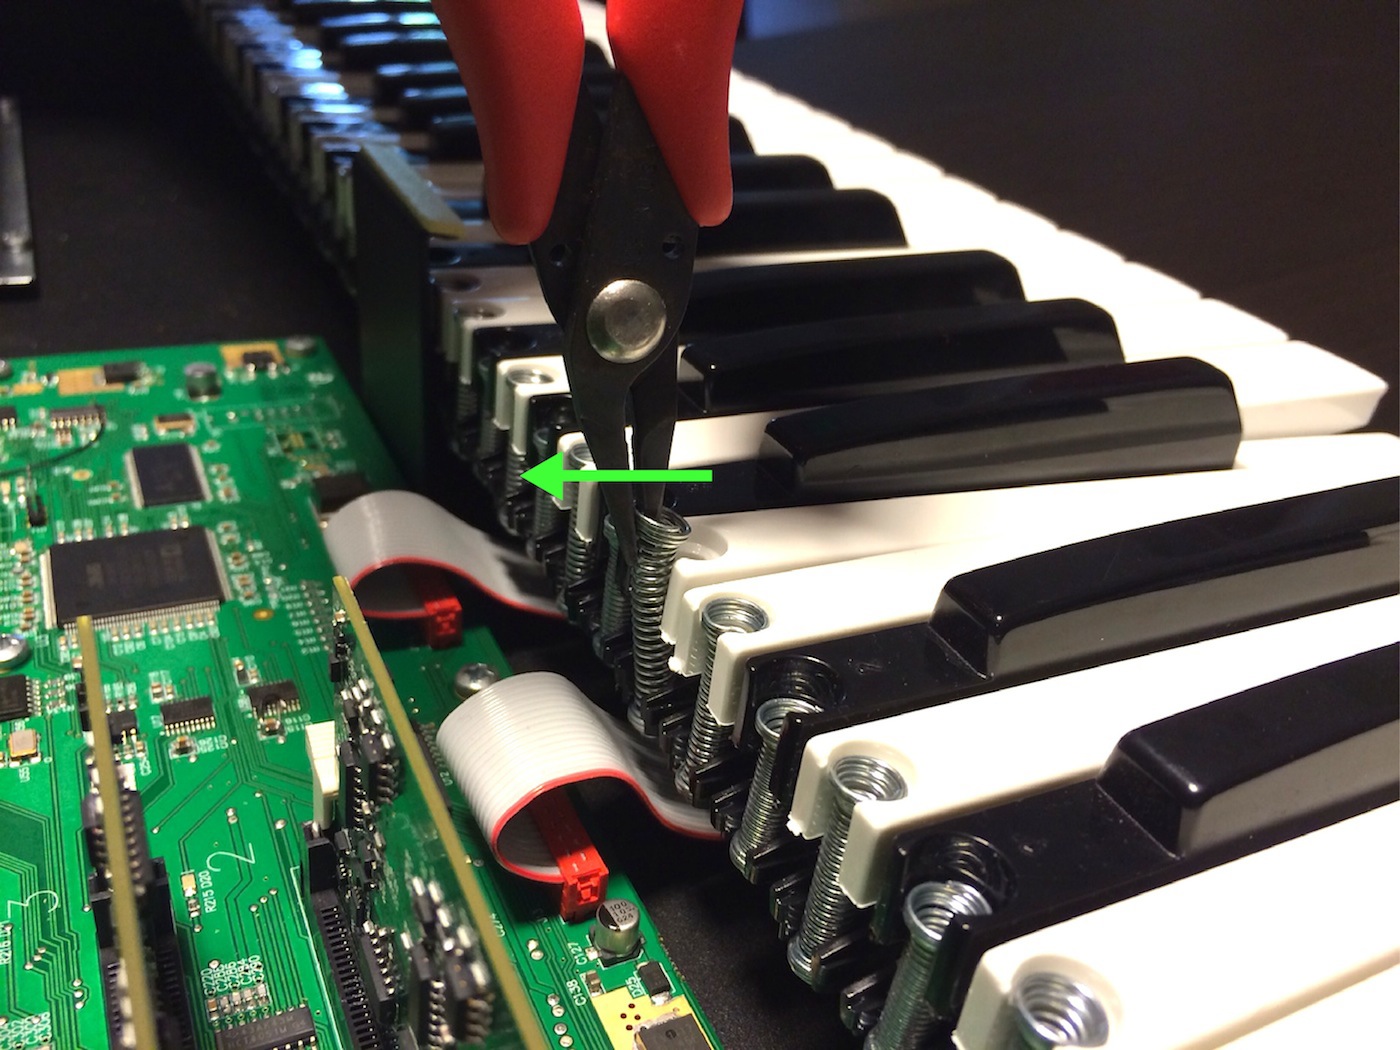
Key Spring Stretched
- Note: You only need to expand the spring a short distance to clear the top of the key, take care that you do not permanently stretch it.
3. Place your index finger behind the back of the key as shown. Pull up and towards you with medium force to release the key from the keybed. It will “snap” loose.
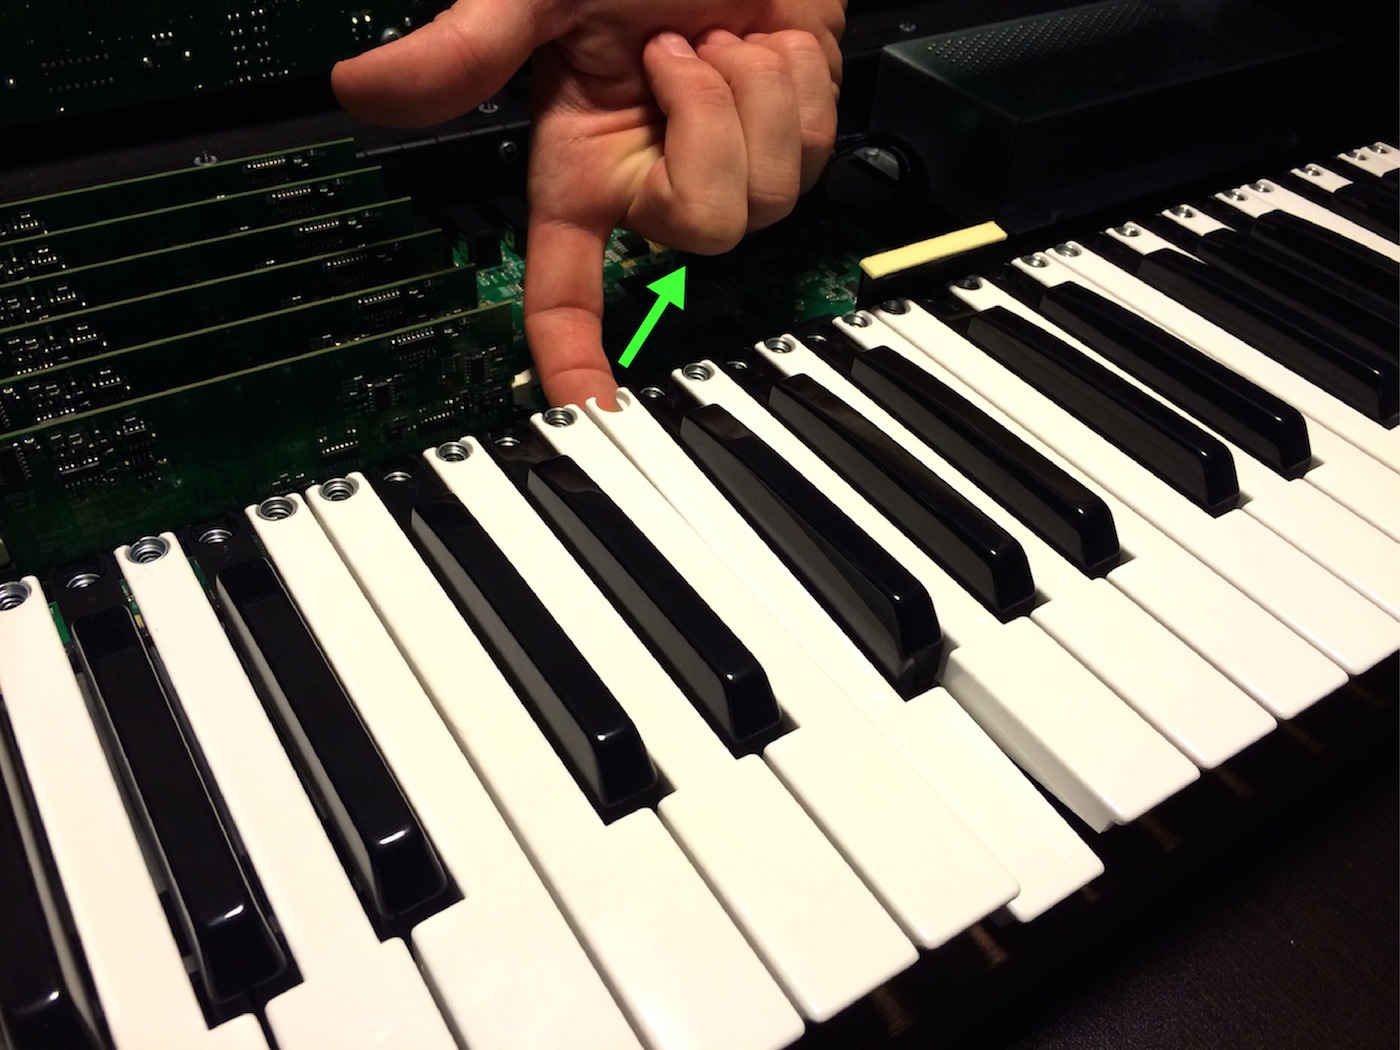
Key Removal
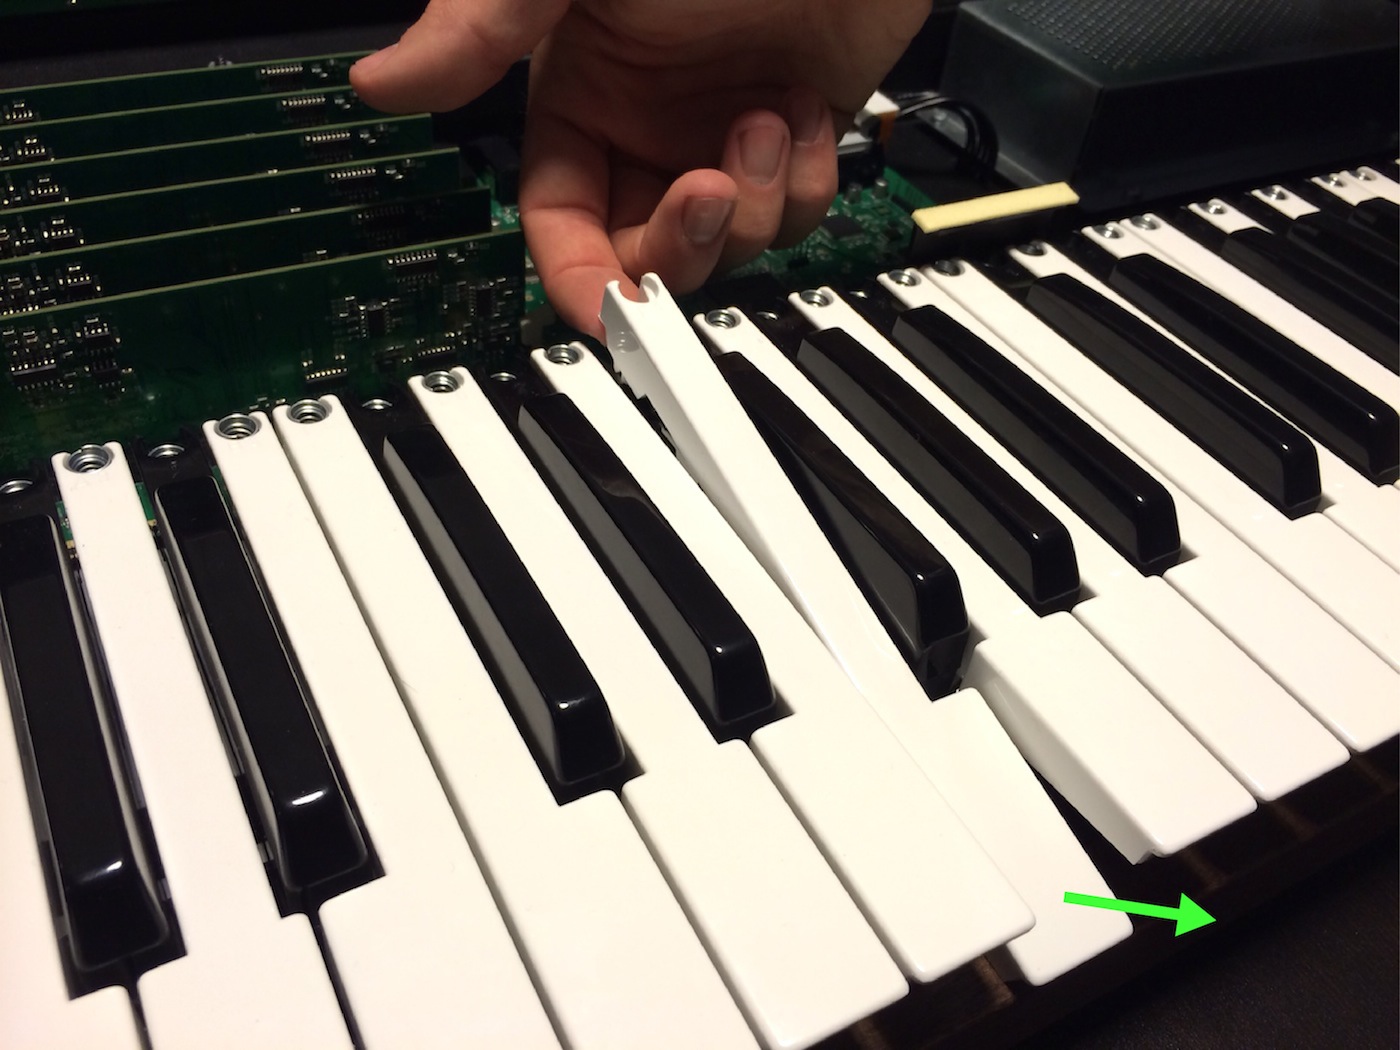
Key Unclipped
The key is fully released in the picture above. Do not to pull up too far, the key cannot be removed by pulling straight up, and needs to be slid forward to be removed from the keybed.
- Note: If you are removing a black key, you will first need to remove the neighboring white keys on either side.
4. Now slide the new key in place and press down on the back of the key until the clip snaps on.
5. Use the needle nose pliers to return the spring to its original position.
Reassemble the Prophet-5 or Prophet-10 in the reverse order:
1. The top panel tends to lie a little too far forward when at rest. While the screws will still go in, the wood may be slightly out of alignment without some attention to detail.
Lid Resting
2. Take care to center align the top panel screw holes with the threads in the bottom panel. For the rear screw, this often means pushing down on the top panel or squeezing the top and bottom panel together with one hand while inserting and tightening the screw with the other. As long as it’s aligned front-to-back, the other two holes should also be aligned.
Lid Adjusted
- Note: Also pay attention to the vertical orientation of the hole and keep it centered on the threads, if pushed too far down the wood may not align properly.
3. When reinstalling the wood sides, put the top rear screw in first and align that corner with the wood trim.
Corner Screw
4. If, in step 2, you pushed/squeezed the top panel down too far, the second screw down in the rear doesn’t align with the threads in the metal. One way to check that is by looking at the gap in the back between the hinge and the ends. It should be the same width (top to bottom) all the way across.
Wood Side Alignment
- Note: Typically, it’s wider at the ends of the instrument, so when you push/squeeze it together it evens out. But it is possible to squeeze it too much which results in the gap being narrower at the ends.
5. After that, any order for the remaining screws will work. Position the front edge of the side panel as flush to the font wood trim as you can.
Please contact Sequential Technical Support if you have any questions regarding the above procedure.