OB-X8 Keyboard: Key Replacement Guide
Removing and/or replacing a key in the OB-X8 is easy and only requires a screwdriver and a pair of needle nose pliers.
Tools needed: Phillips head screwdriver, needle nose pliers.
Getting inside the OB-X8:
1. First, unplug all power/MIDI/USB/audio cables.
2. Next, remove the 5 screws on each of the wooden sides.
- Note: Wood is sturdy but delicate, and can be scratched or damaged if you’re not careful. Take your time to ensure your wood remains in pristine condition during disassembly and reassembly.
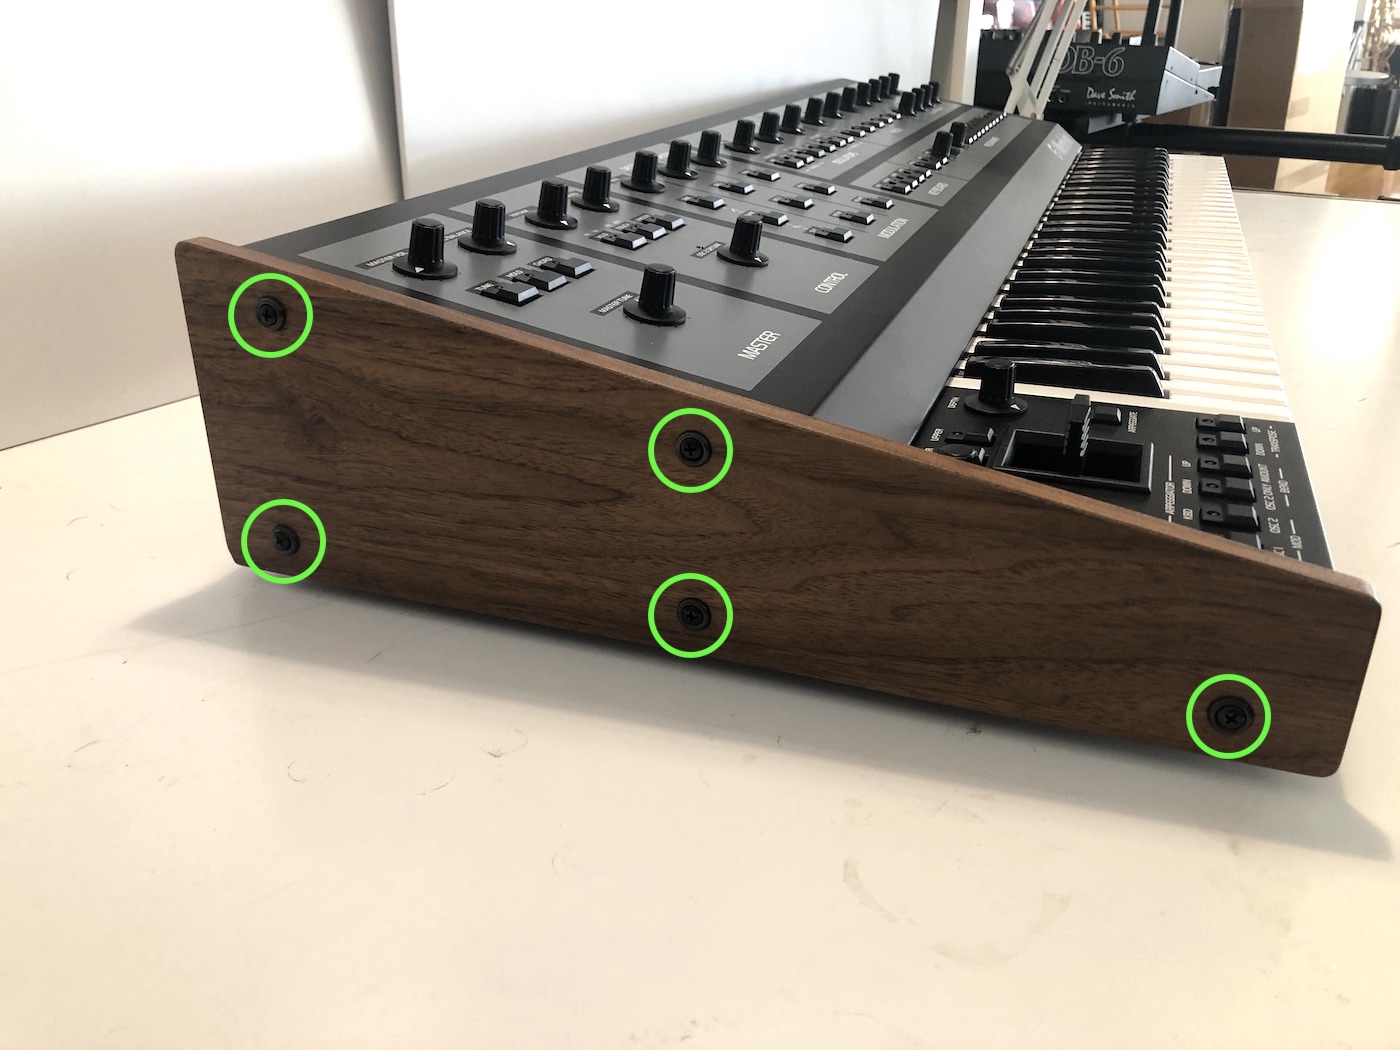
OB-X8 Left Wood Panel
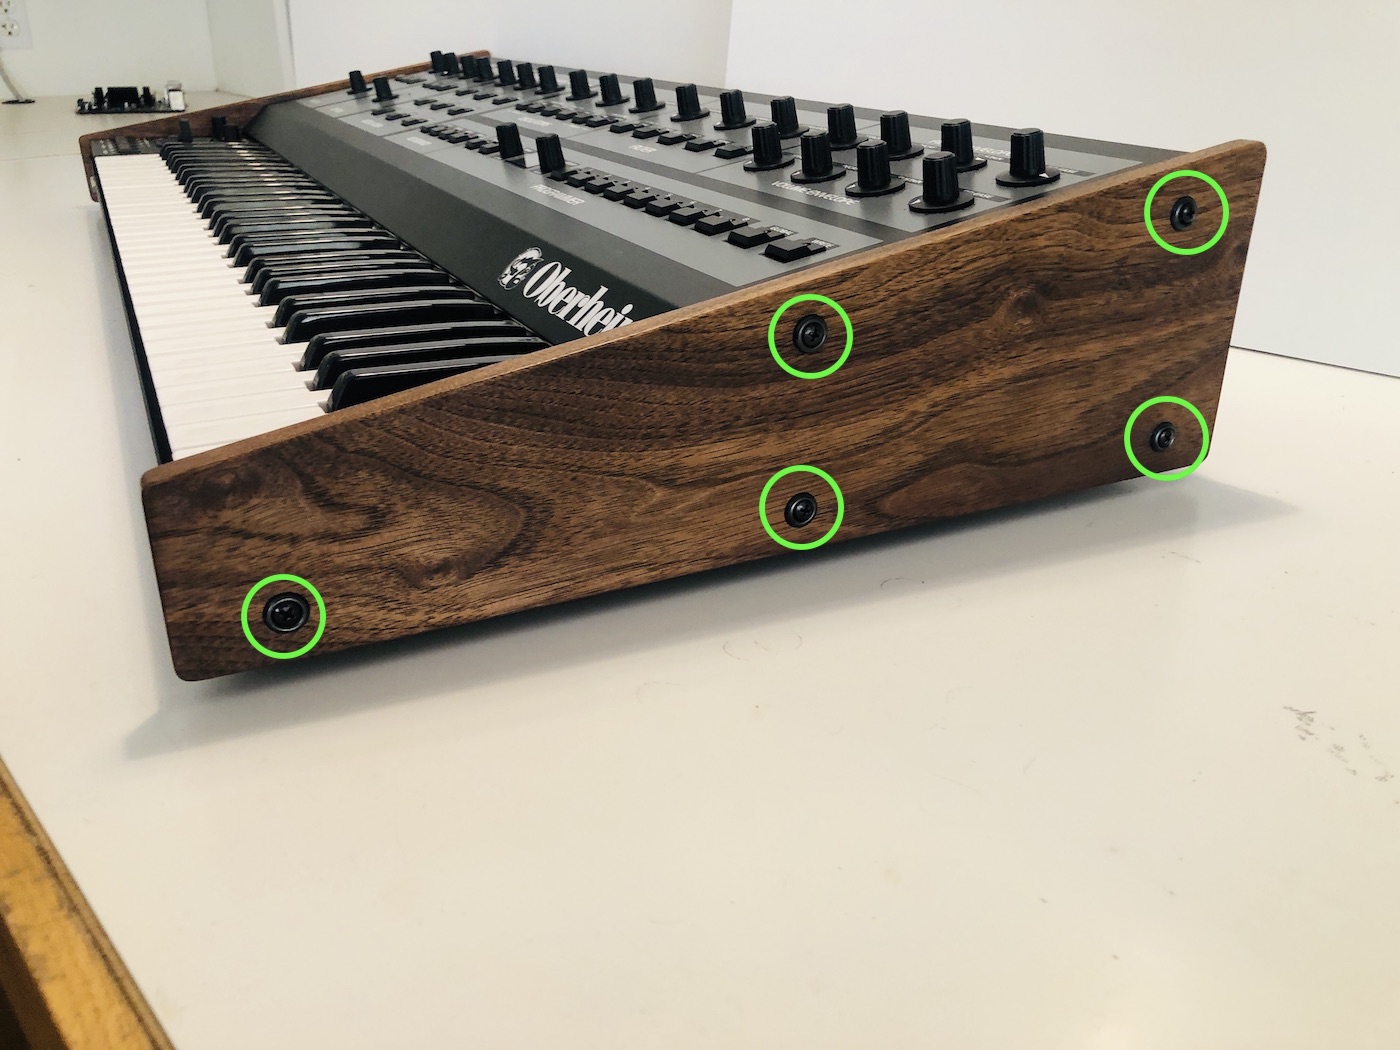
OB-X8 Right Wood Panel
3. Underneath the left wooden side, remove the single screw in the metalwork.
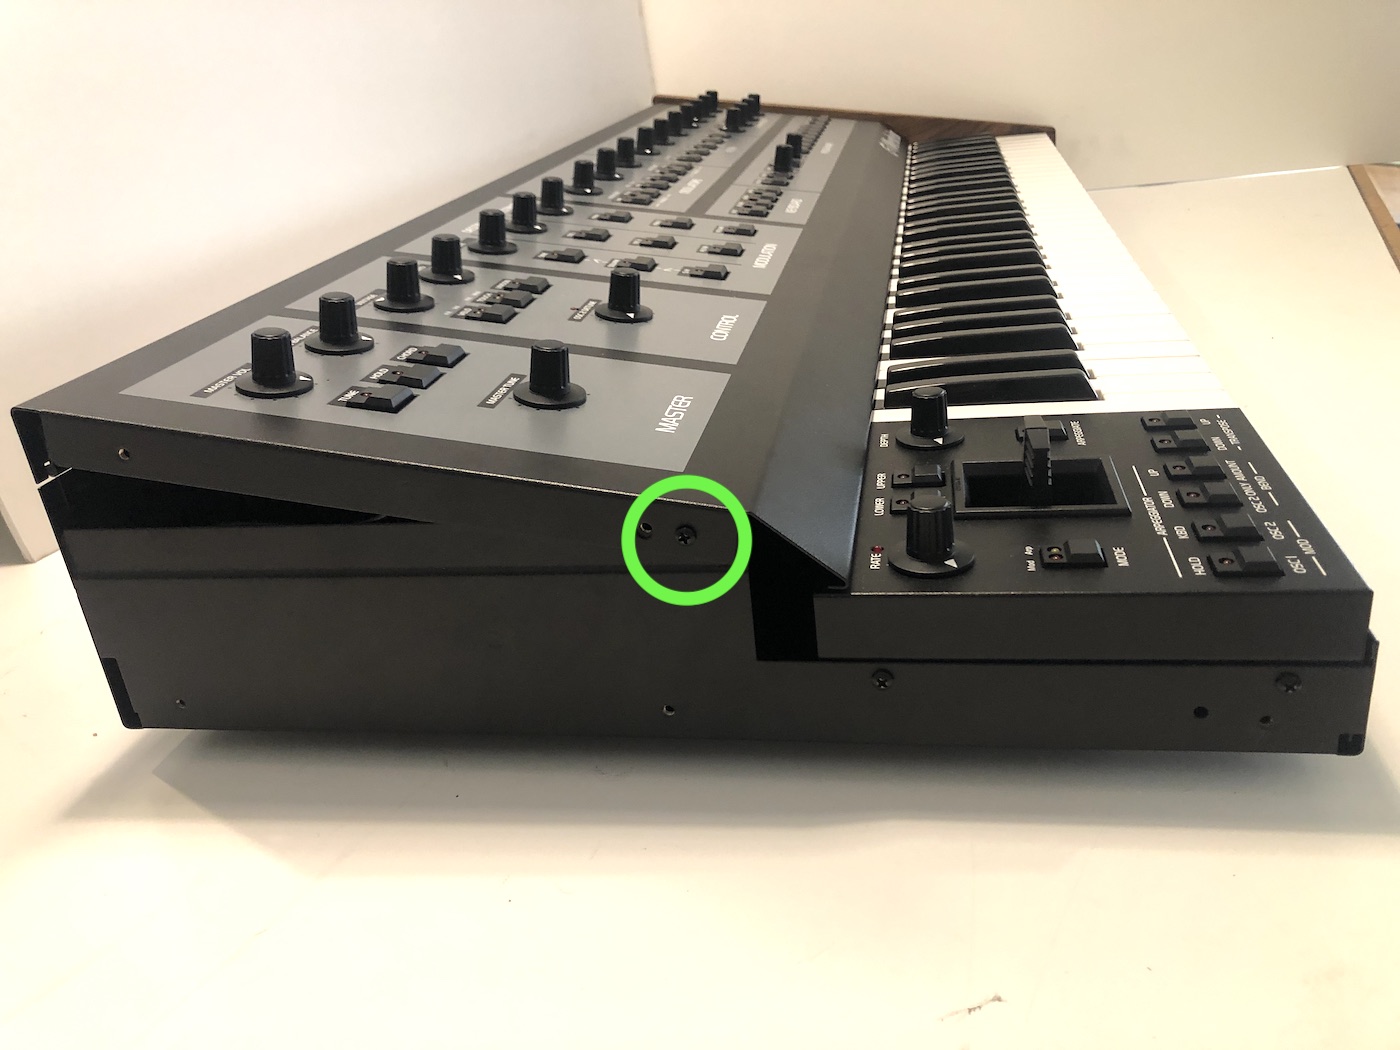
OB-X8 Left Metal Screw
4. Underneath the right wooden side, remove the single screw in the metalwork.
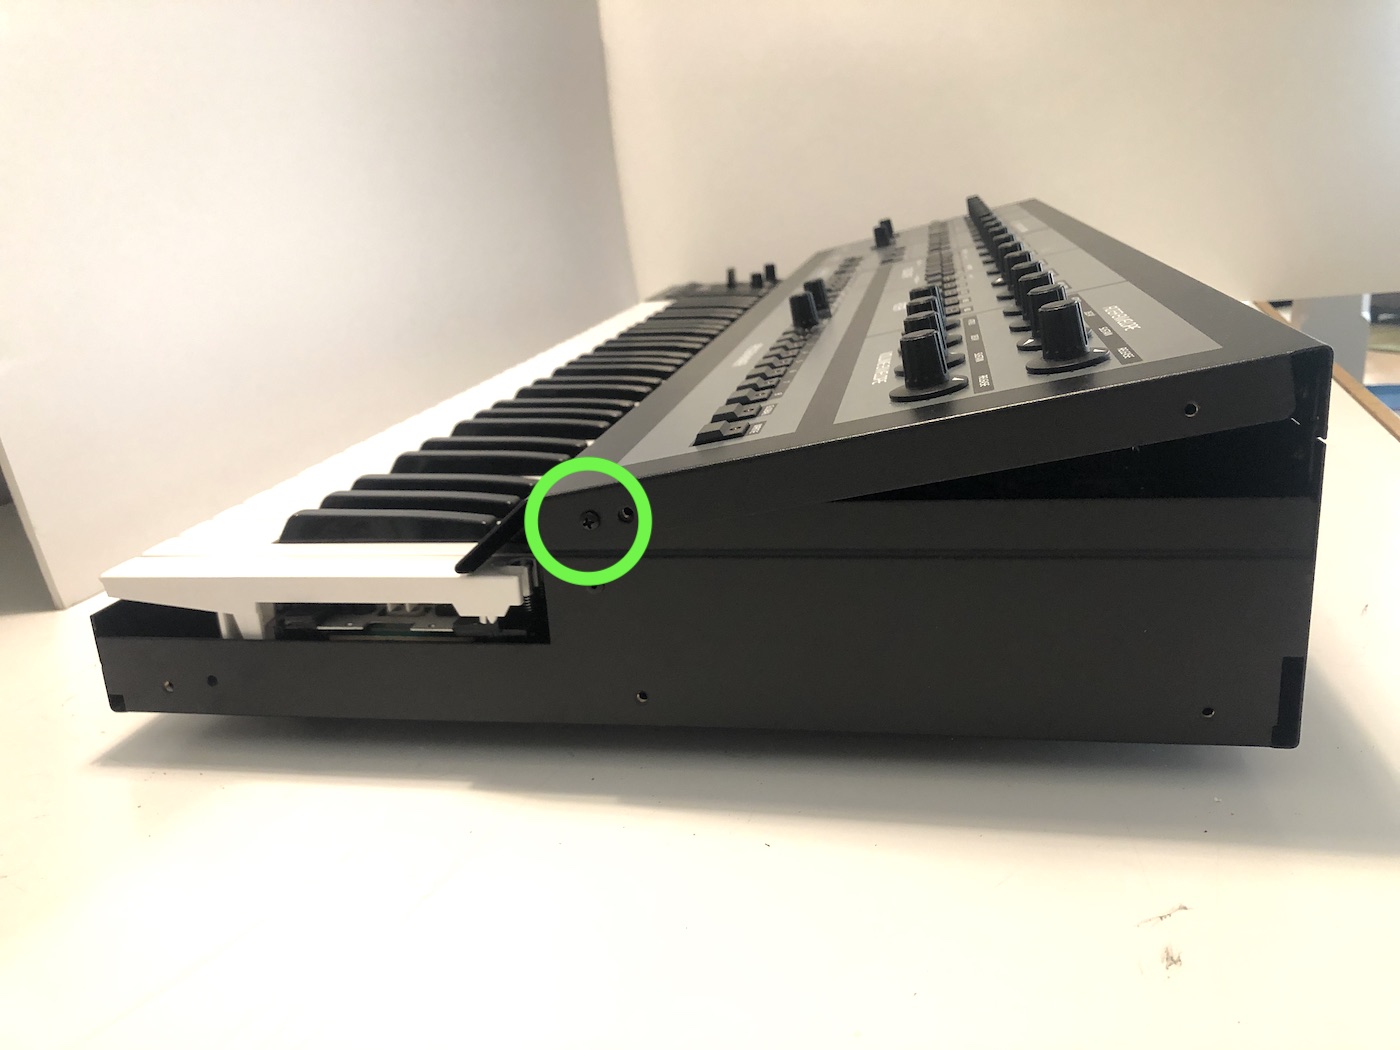
OB-X8 Right Metal Screw
You can now lift the lid open from the front. It is hinged and it will stay open with the attached lanyard.
Removing or replacing a key:
1. The keys on the OB-X8 are held in place by the key spring at the back of the key and by a plastic clips integral to the sides of the key near the back. To release the key spring, grasp the upper coils with needle nose pliers and pull it straight up, just until the wider coils are clear of the top of the key.
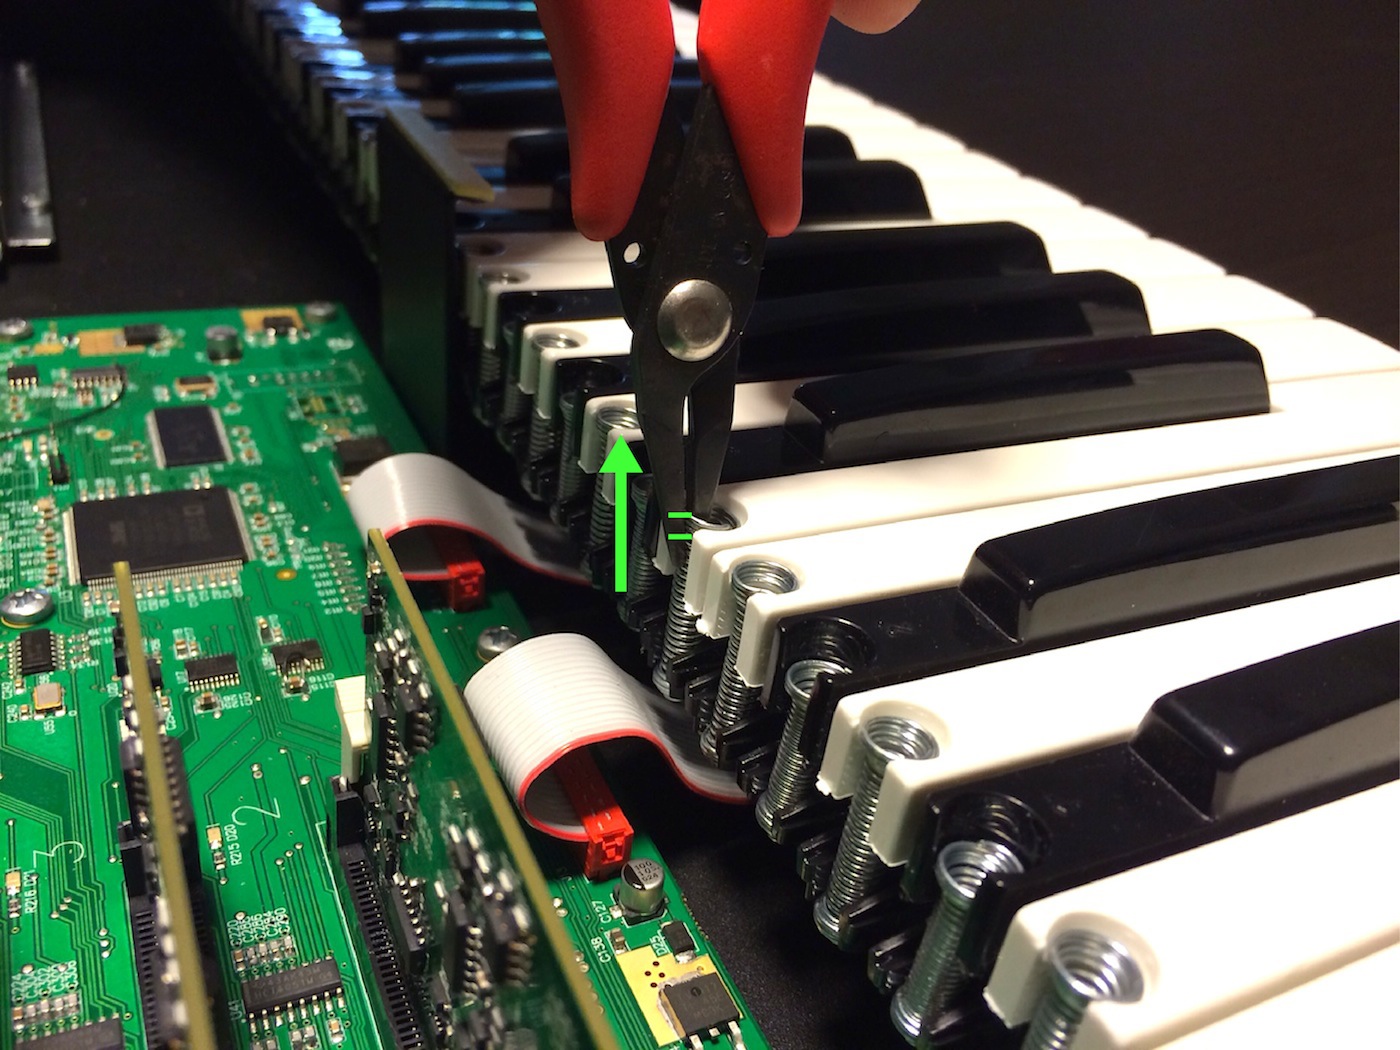
OB-X8 Key Spring
2. Now pull back, moving the spring out of its retainer cup. Relax the spring and set it aside.
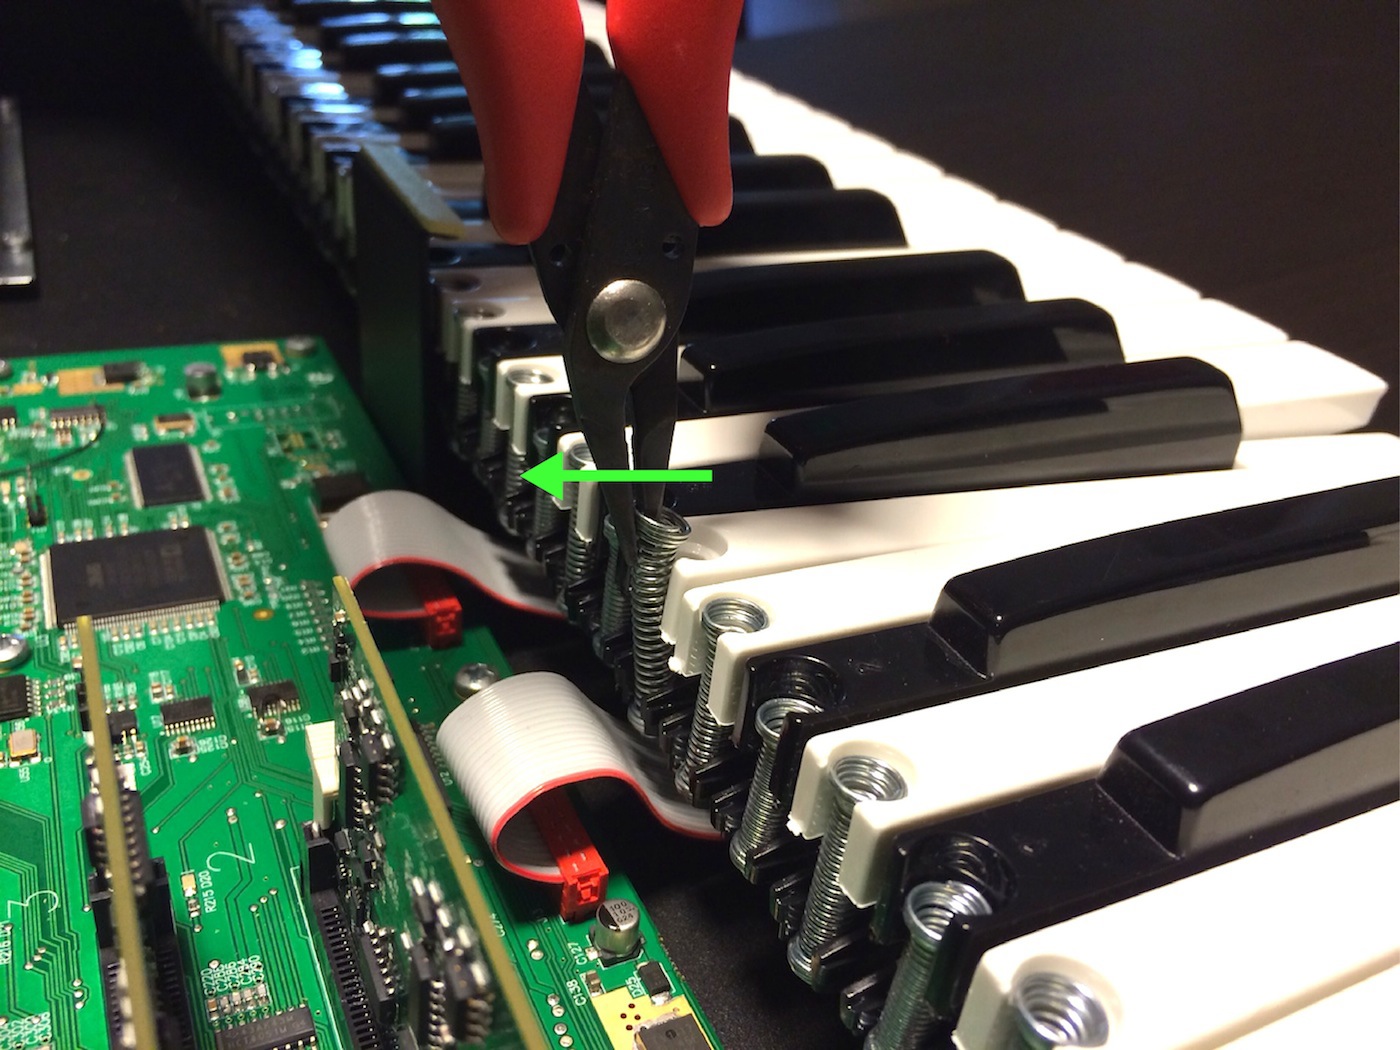
OB-X8 Key Spring Stretched
- Note: You only need to expand the spring a short distance to clear the top of the key, take care that you do not permanently stretch it.
3. Place your index finger behind the back of the key as shown. Pull up and towards you with medium force to release the key from the keybed. It will “snap” loose.
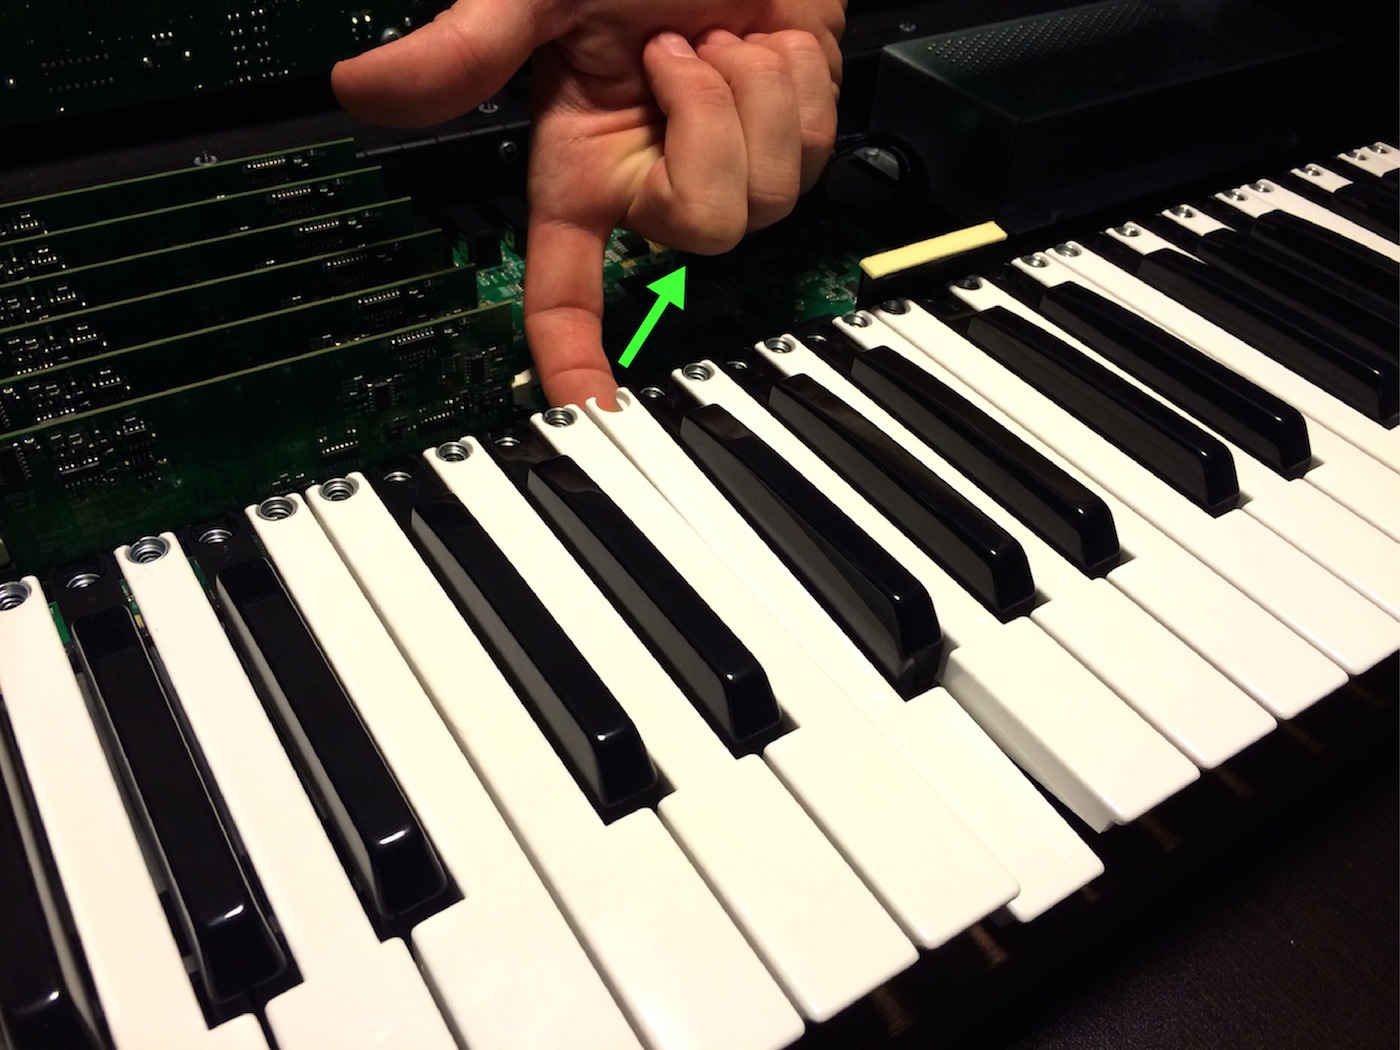
OB-X8 Key Removal
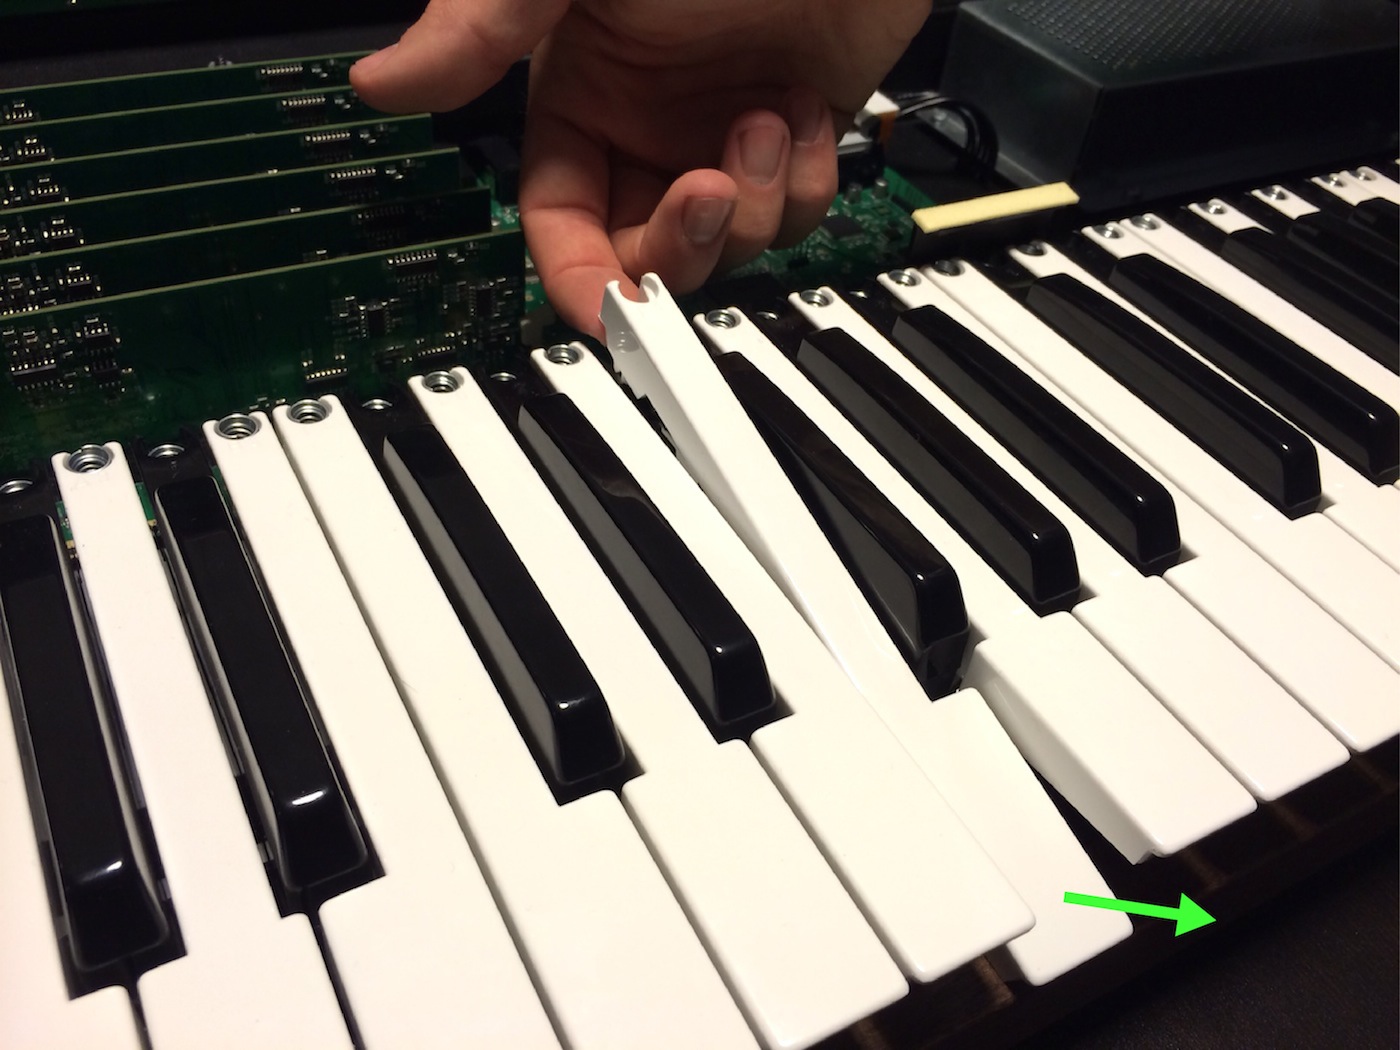
OB-X8 Key Unclipped
The key is fully released in the picture above. Do not to pull up too far, the key cannot be removed by pulling straight up, and needs to be slid forward to be removed from the keybed.
- Note: If you are removing a black key, you will first need to remove the neighboring white keys on either side.
4. Now slide the new key in place and press down on the back of the key until the clip snaps on.
5. Use the needle nose pliers to return the spring to its original position.
Reassemble the OB-X8 in the reverse order.
Please contact Oberheim Technical Support if you have any questions regarding this procedure.