OB-X8 Keyboard: Both Panel Boards Removal
Removing or replacing the panel boards in the OB-X8 is easy and only requires basic hand tools.
Tools needed: Phillips head screwdriver, 10 x 125 mm nut driver.
Getting inside the OB-X8:
1. First, unplug all power/MIDI/USB/audio cables.
2. To remove the panel boards, you’ll first need to remove all of the knobs.
3. To remove the knobs, pull straight up. They are tight but not attached, so they just slide on and off by hand, DO NOT twist the knobs.
4. Use the 10 x 125 mm nut driver to remove the nuts and washers at the bottom of the pot shafts.
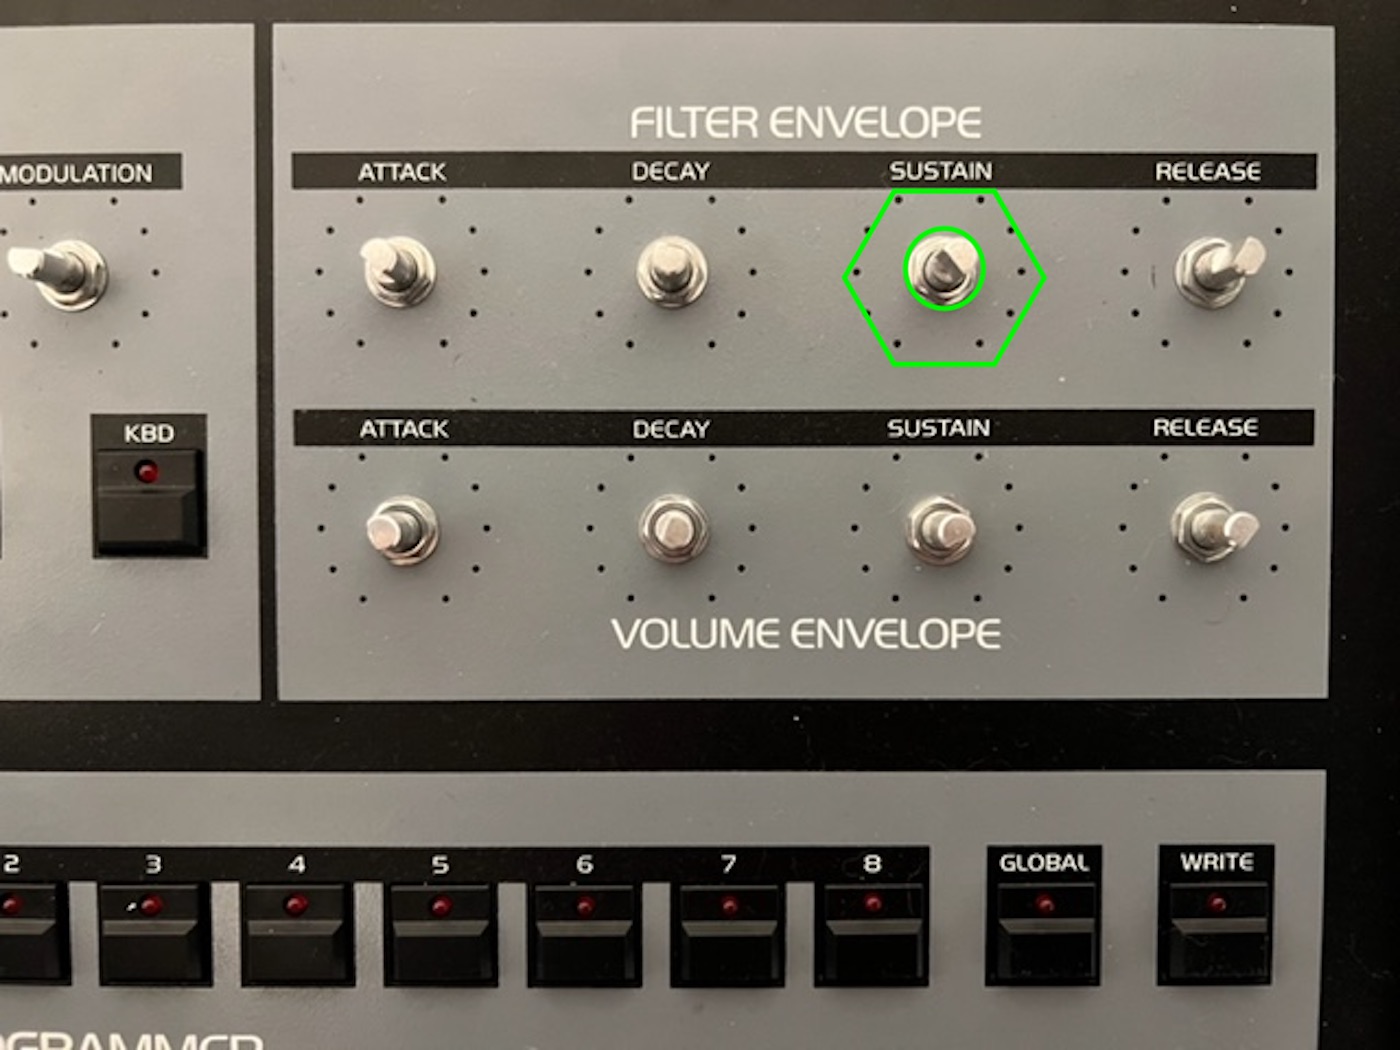
Pots nuts and washers
5. Now unscrew the 5 screws on each of the wooden sides.
- Note: Wood is sturdy but delicate and can be scratched or damaged if you’re not careful. Take your time to ensure your wood remains in pristine condition during disassembly and reassembly.
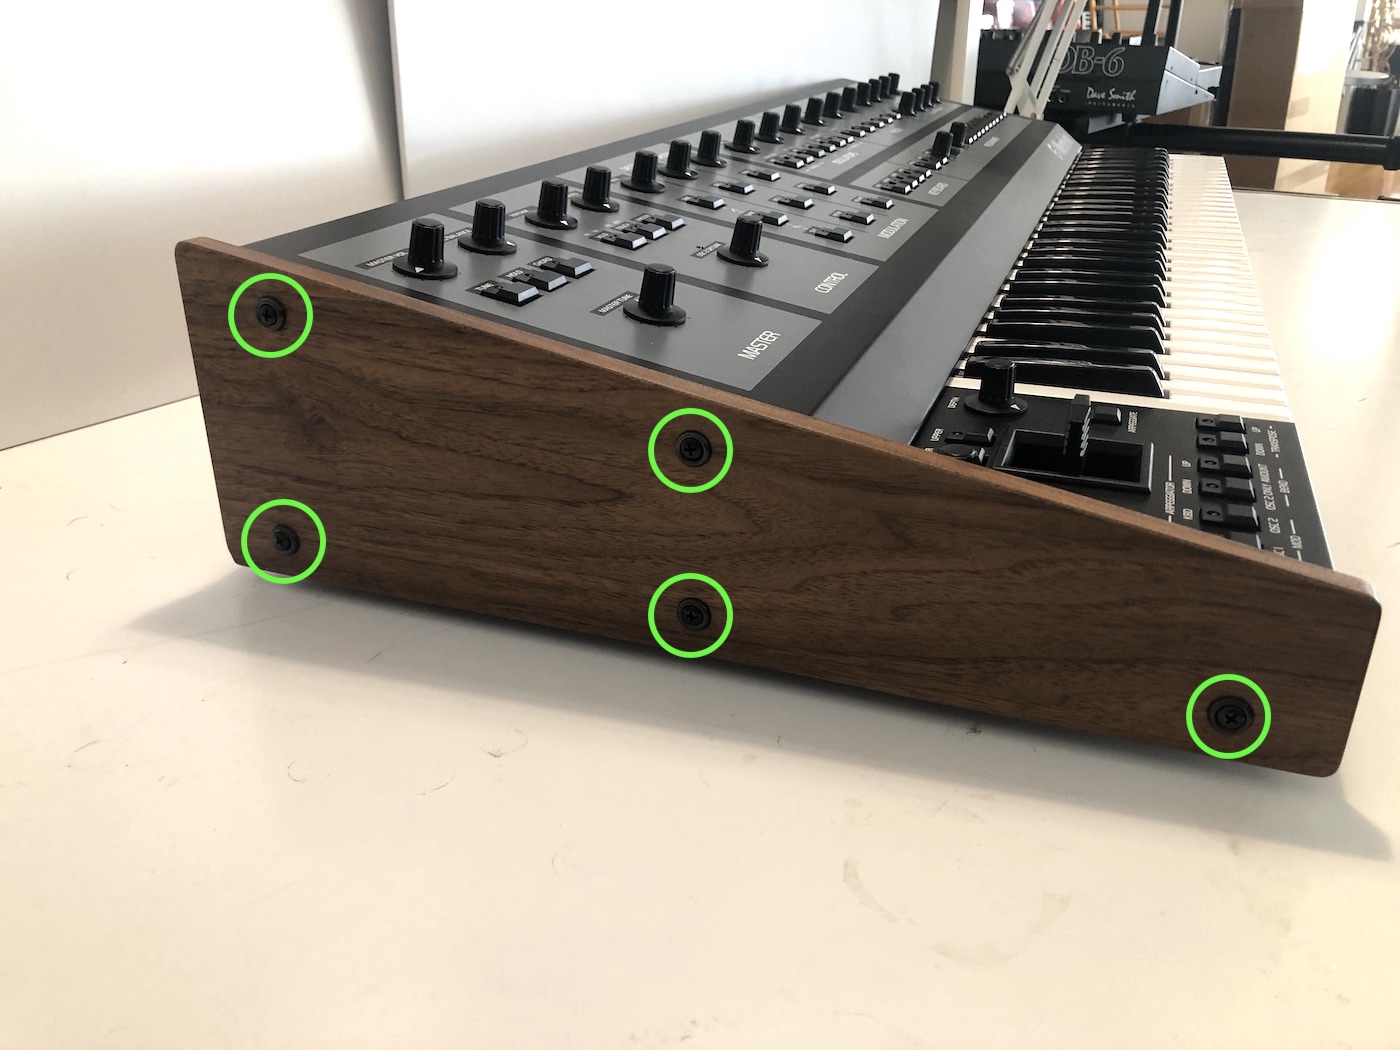
OB-X8 Left Wood Panel
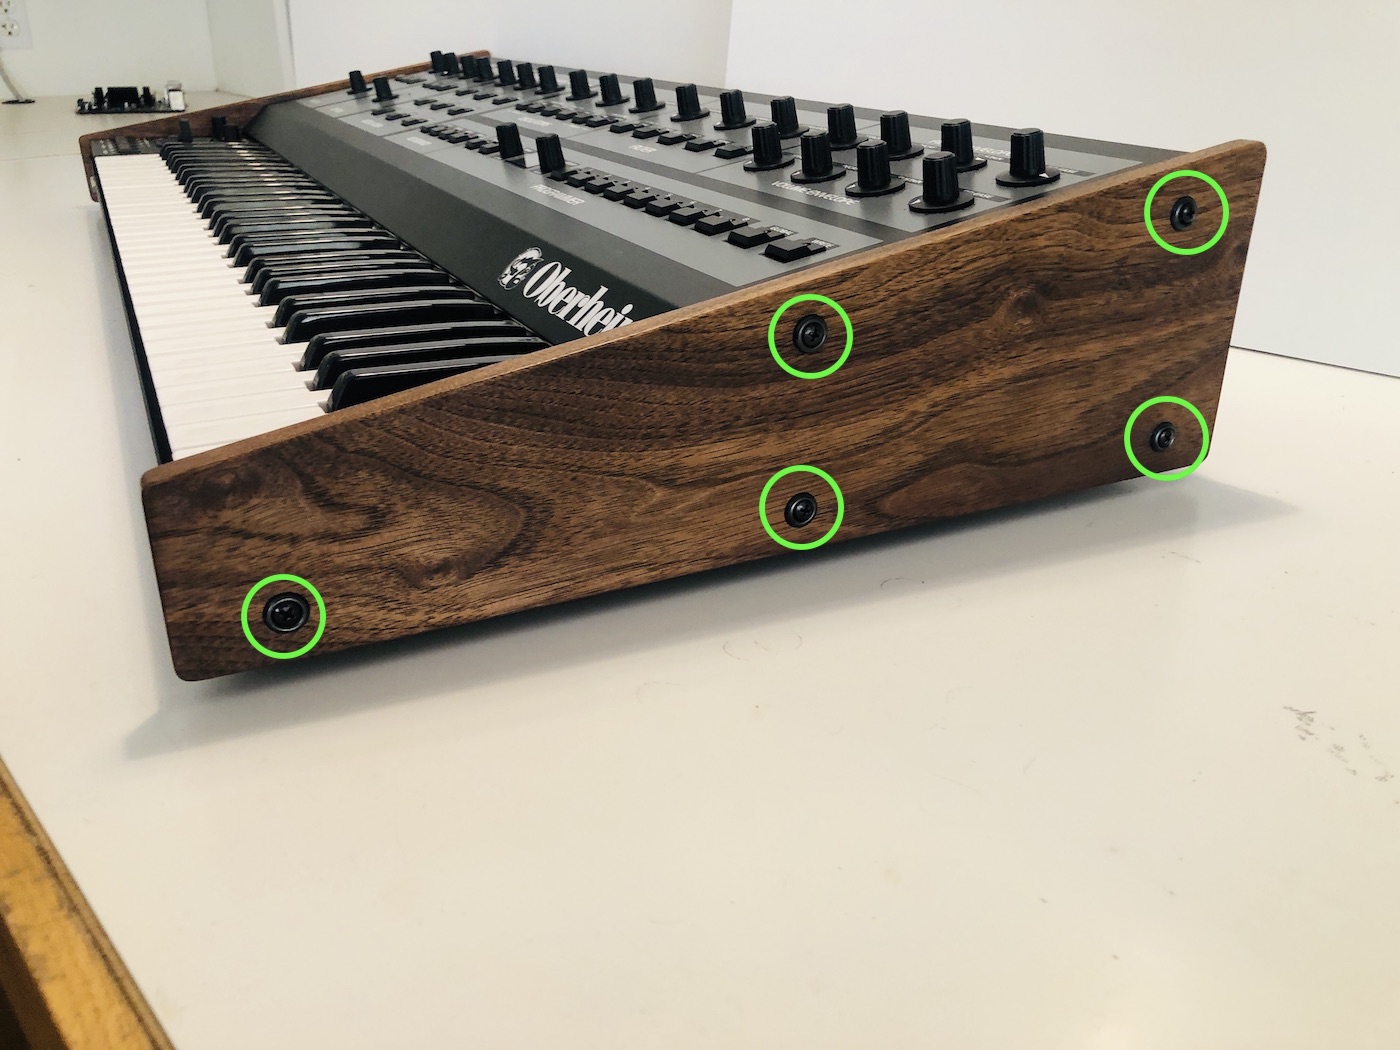
OB-X8 Right Wood Panel
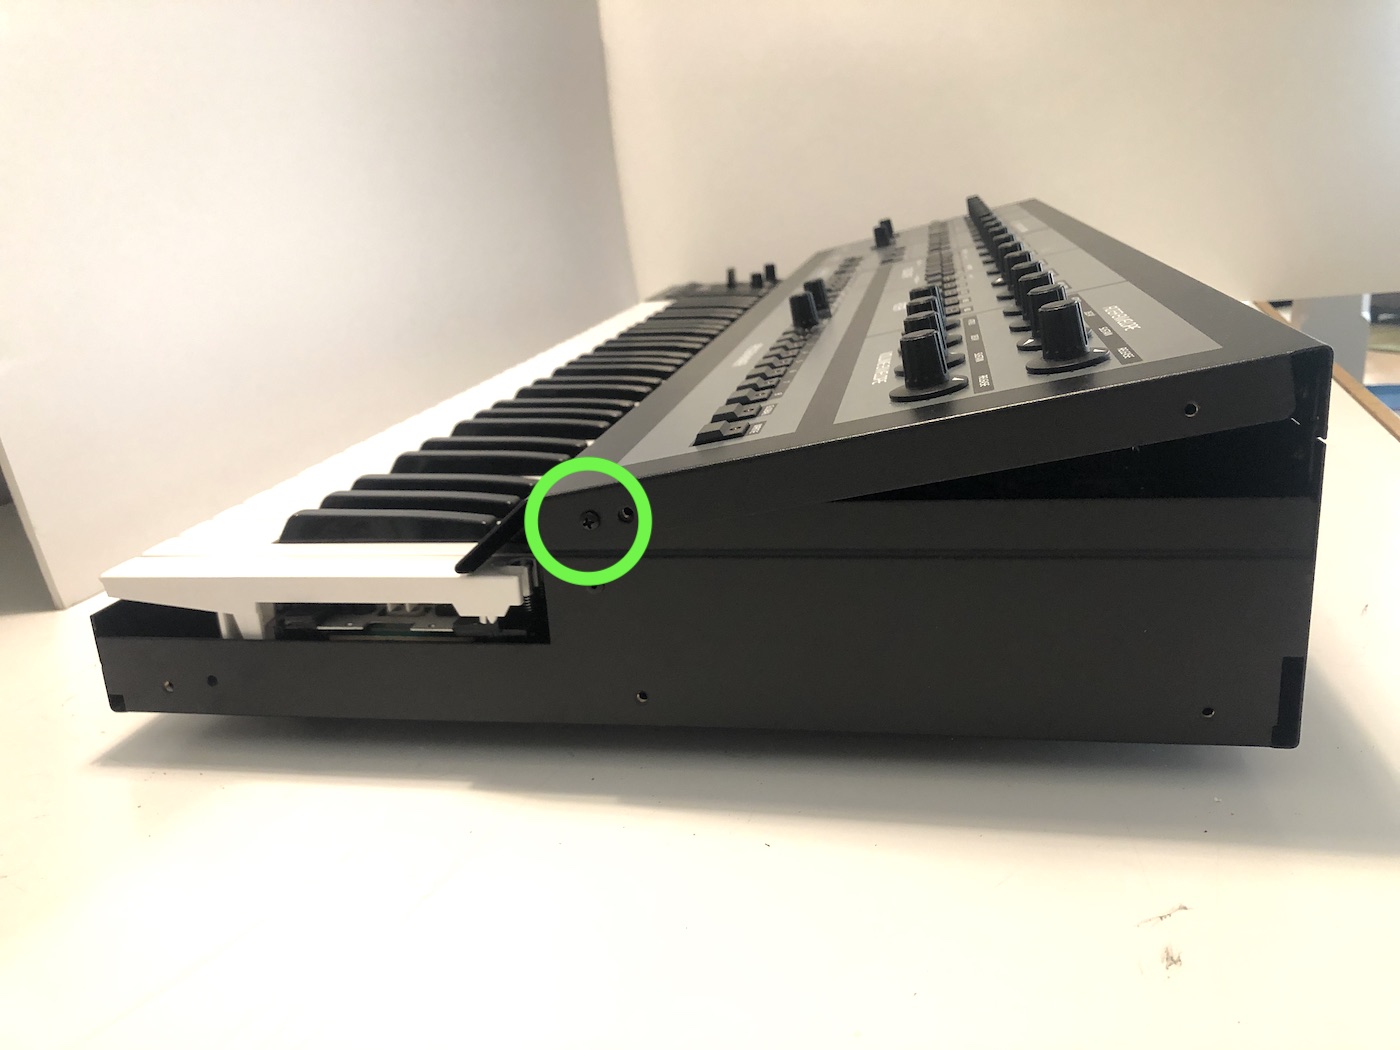
6. Underneath the left wooden side, remove the single metal screw.
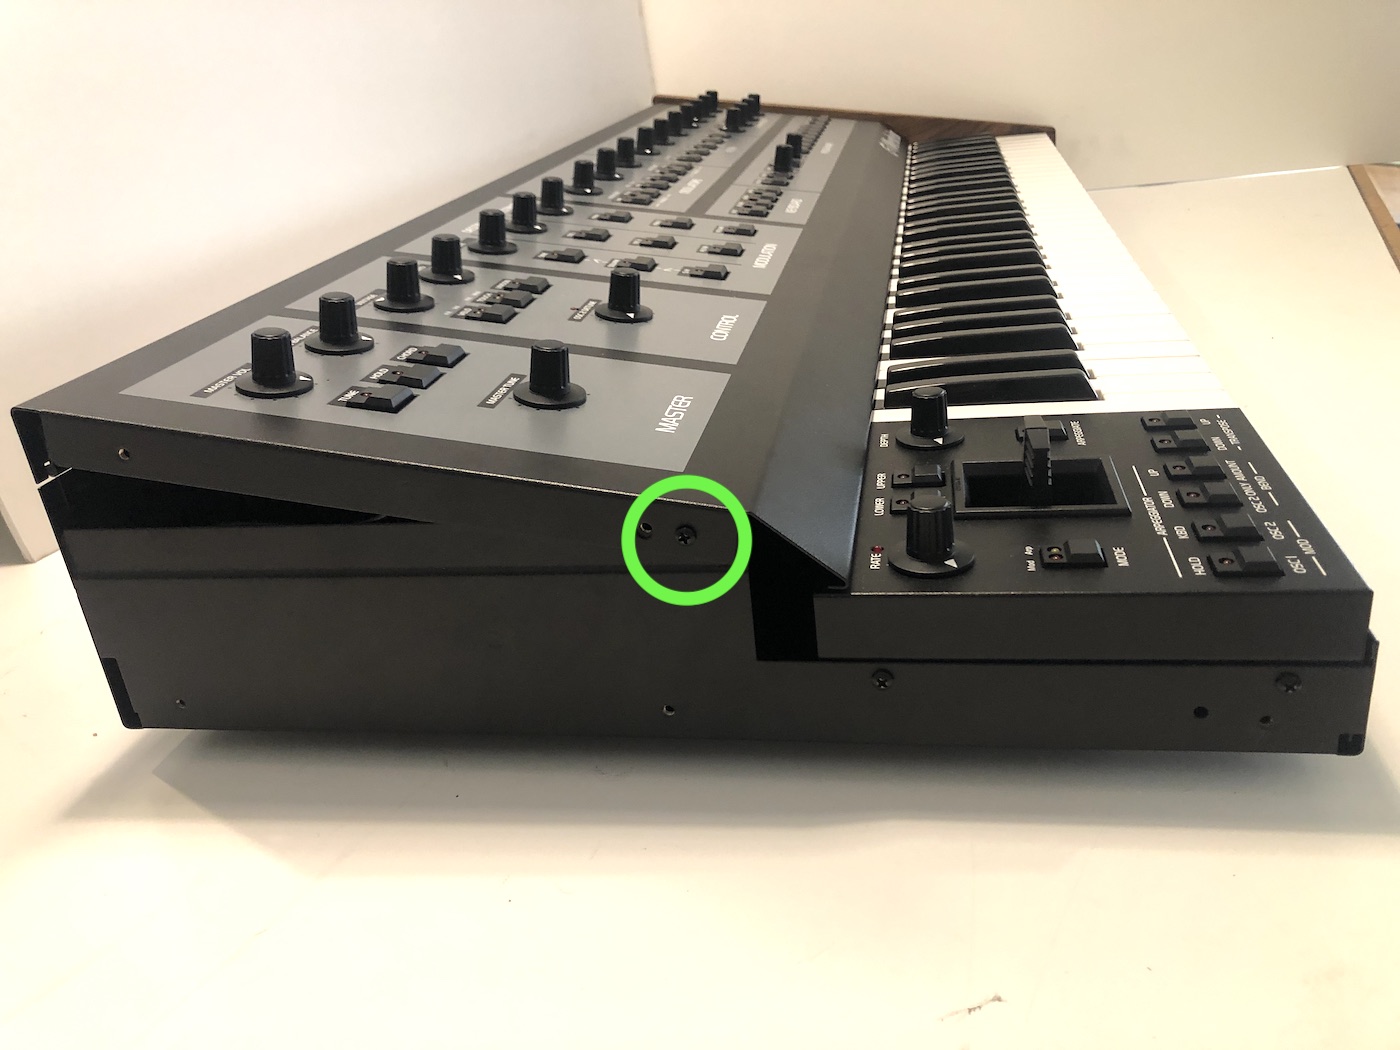
OB-X8 Left Metal Screw
7. Underneath the left wooden side, remove the single metal screw.
OB-X8 Right Metal Screw
8. You can now lift the lid open from the front. It is hinged, and it will stay open with the attached lanyard.
Removing the panel boards:
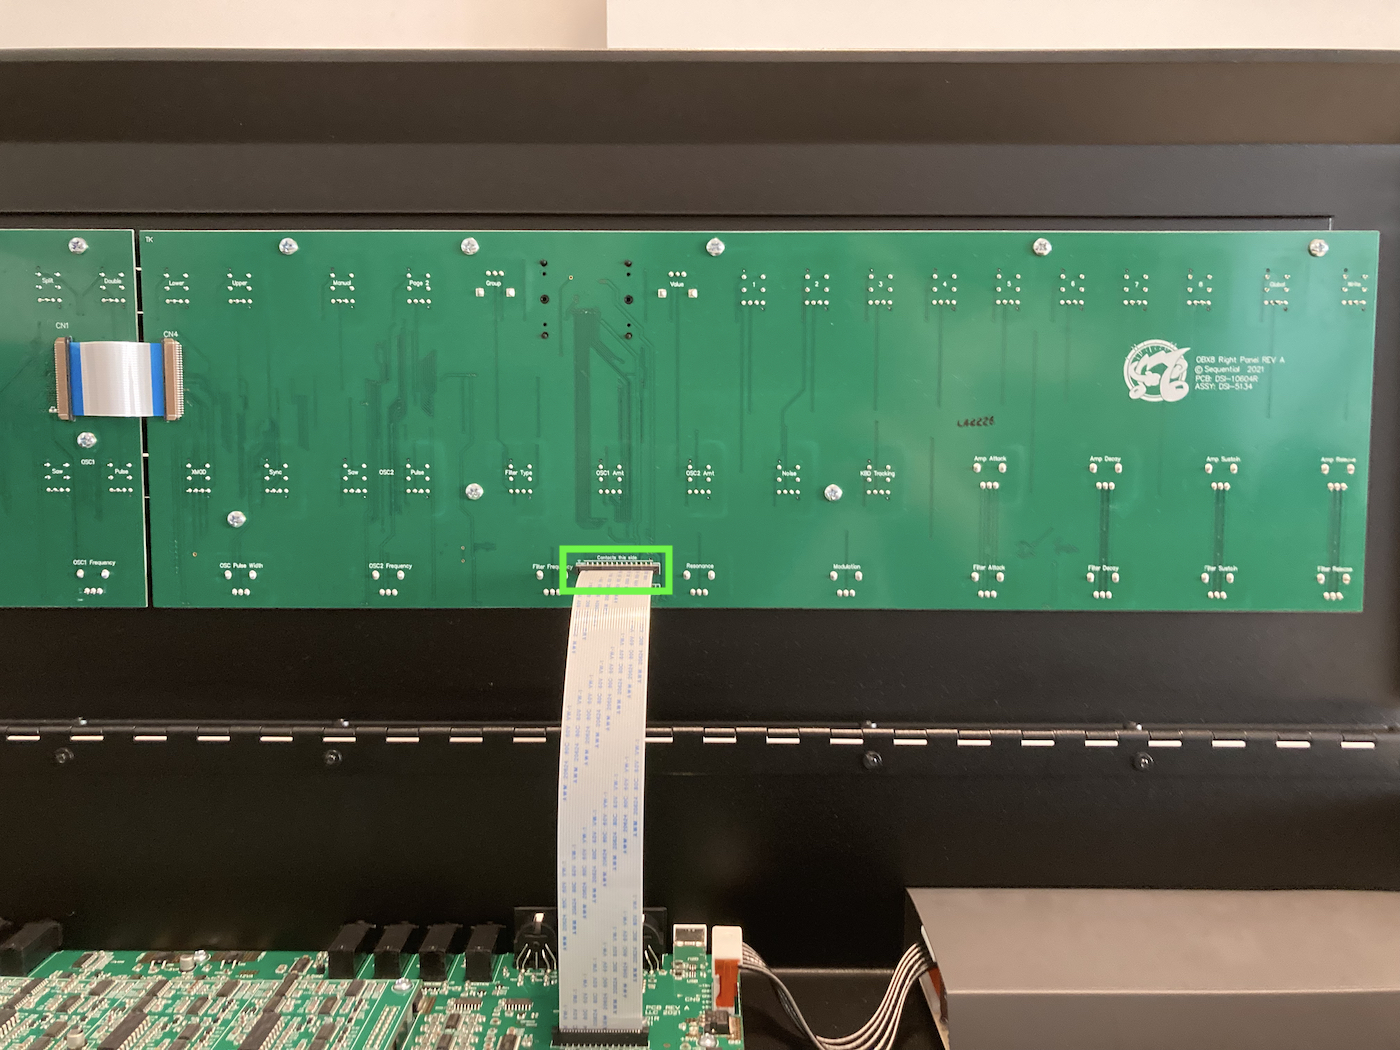
1. Start by locating the long ribbon cable that connects the main board to the right panel board. There is a thin, black locking tab on each connector that holds the ribbon cable in. The tab can be easily opened by gently lifting up on each end with your fingernails. The locking connectors don’t come out completely, they are fully unlocked after moving ~3 millimeters. The ribbon cable will easily slide out once the connector is unlocked. On the right panel board side only, gently lift the locking connector out of place and remove the ribbon cable. When reinstalling the ribbon cable, make sure the tabs are open, slide the cable back into the slot, then close the tabs when the ribbon is fully inserted.
- Note: The locking mechanism is delicate. Take care to only pull by the amount required to unlock it. If too much force is applied the connector will be damaged.
- Note: When reinstalling the ribbon, first make sure the tabs are open, then just push the connector straight down, and the tabs will close behind it. Push the tabs together to make sure the cable is firmly seated.
OB-X8 Mainboard FFC removal
OB-X8 Right Panel to Main Ribbon
2. Looking at the panel boards, you’ll see a short but wide ribbon cable connecting the left and right panels. Using the same technique, gently unlock the black locking tab on both sides, then slide the cable out. When reinstalling the cable, make sure that the black tab is unlocked, then slide the ribbon cable into place and lock the connectors.
3. Unscrew the 9 silver screws holding the left panel board to the front panel metal.
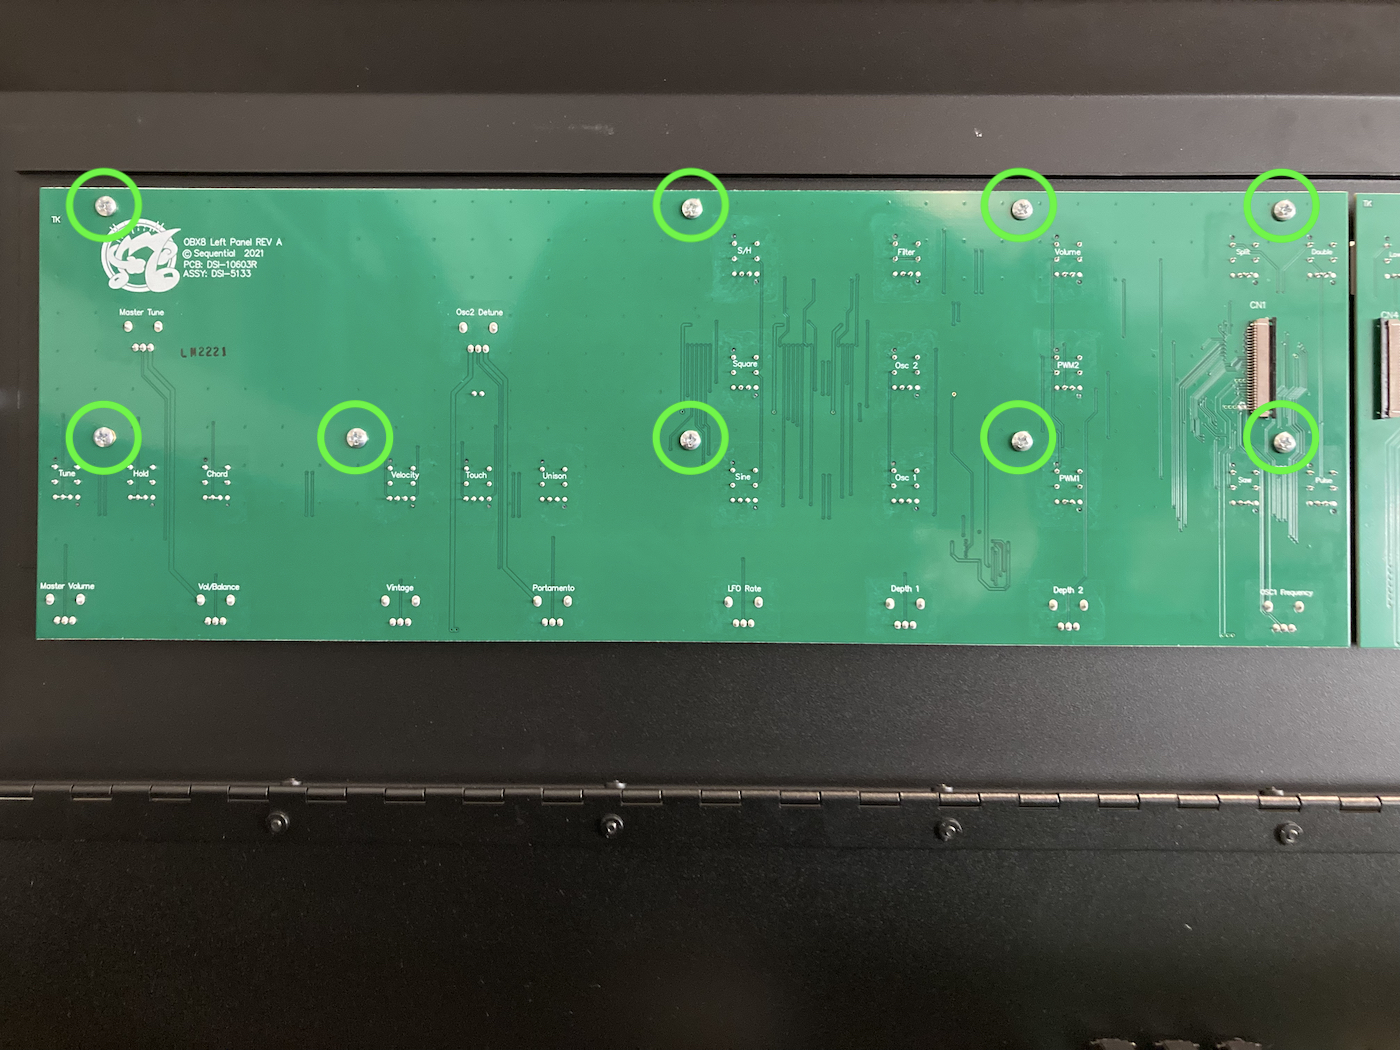
Left Panel Screws
4. The left panel board can now be removed.
5. Unscrew the 8 silver screws holding the right panel board to the front panel metal.
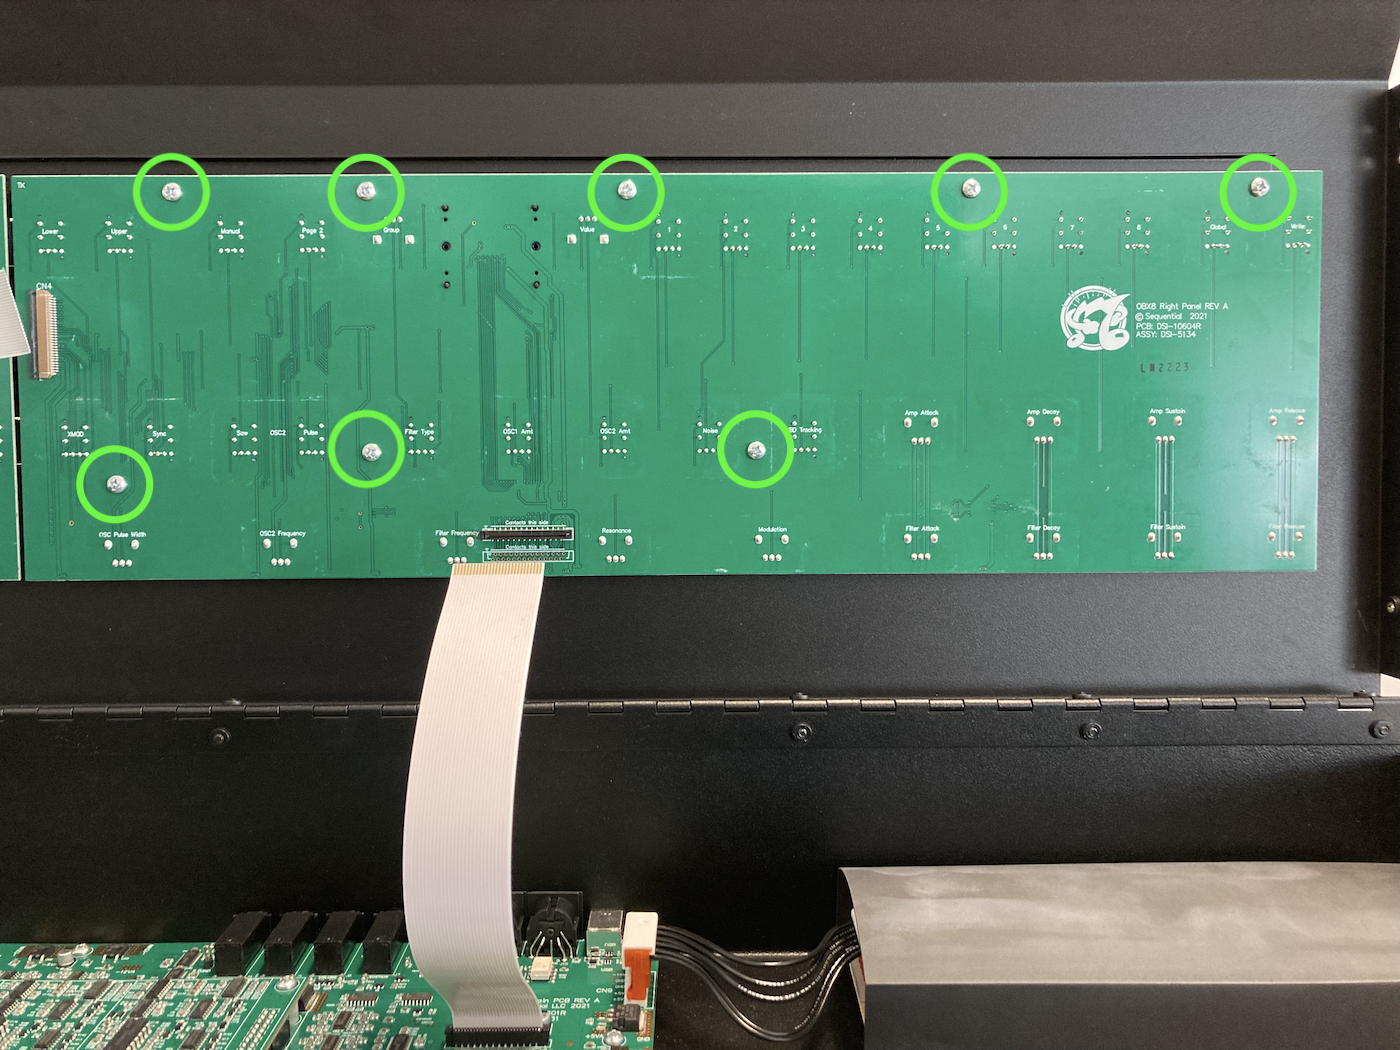
Right Panel Screws
6. The right panel board can now be removed.
Install the panel boards back into the unit, and reassemble the OB-X8 in the reverse order.
Please contact Oberheim Technical Support if you have any questions regarding the above procedure.