Mopho Keyboard: Keybed Removal
Removing the keybed from the Mopho Keyboard is an easy procedure and only requires a screwdriver.
Tools needed: Phillips screwdriver. Possibly a small amount of electrical tape if replacing the keybed.
Getting inside the Mopho Keyboard:
1. First unplug all audio/MIDI/USB/power cables.
2. Next, remove the 2 upper screws on each wooded side.
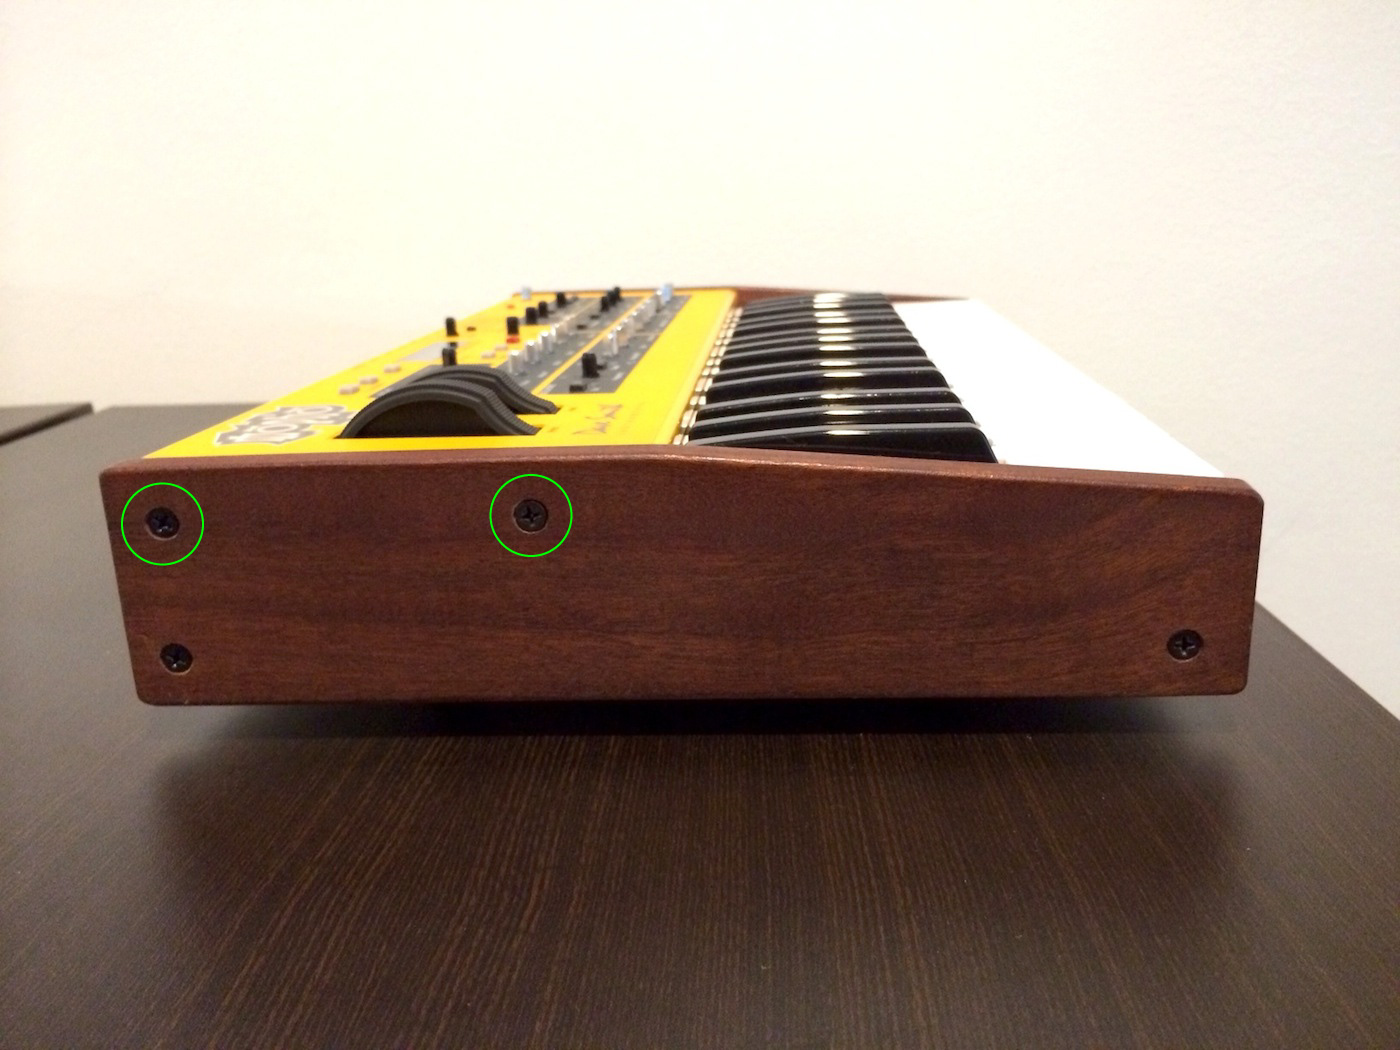
Left Wooden Side
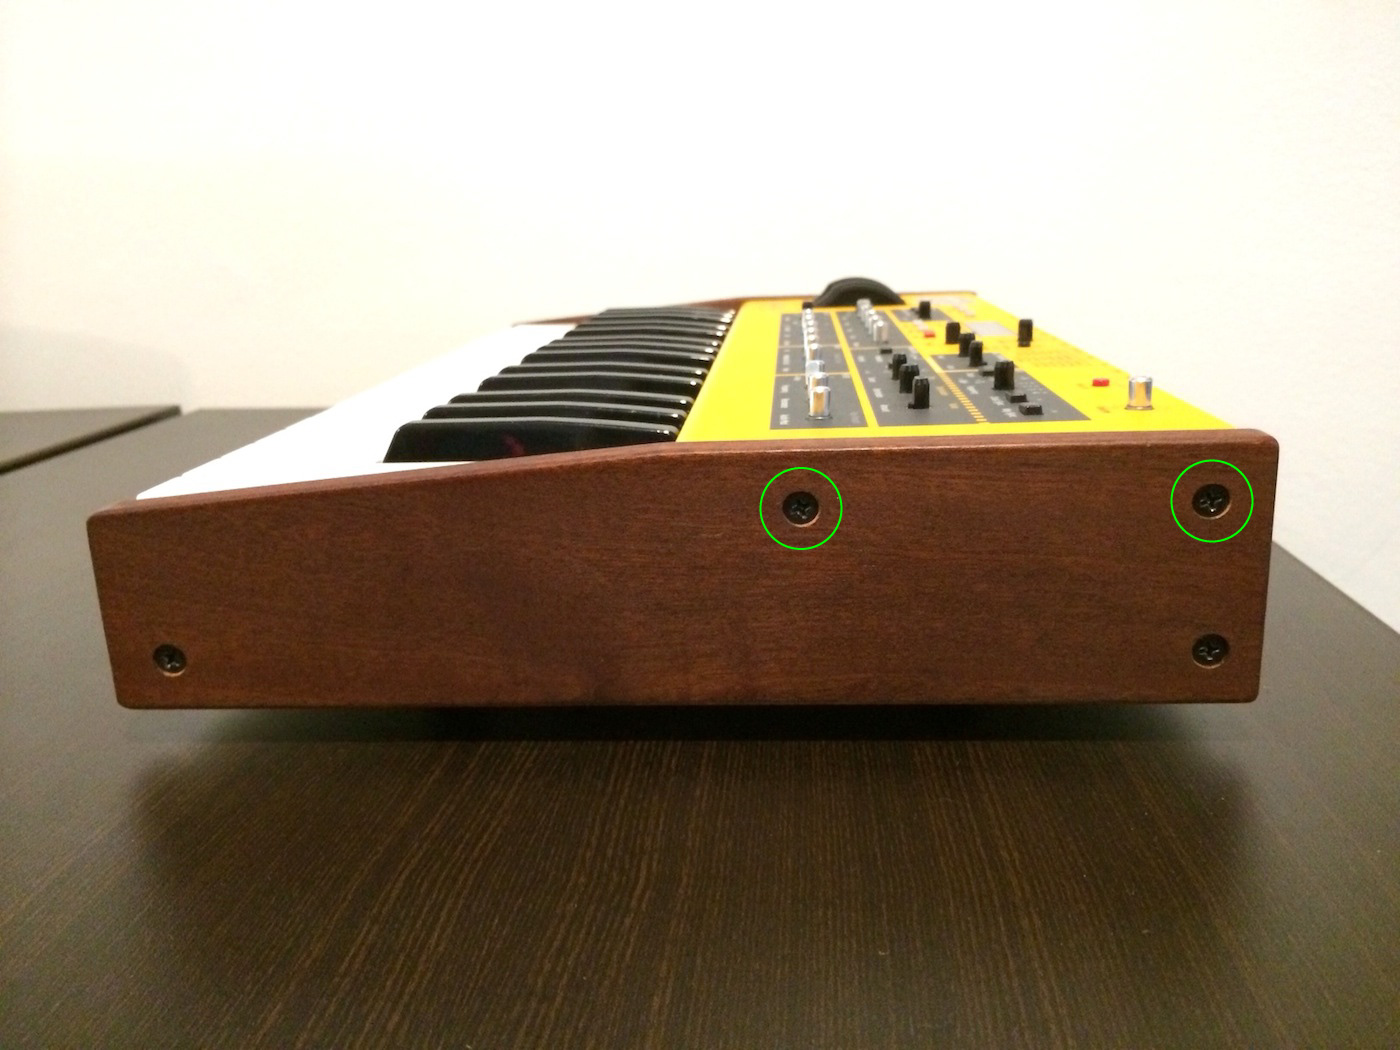
Right Wooden Side
3. Now remove the 5 screws along the rear panel of the Mopho Keyboard.
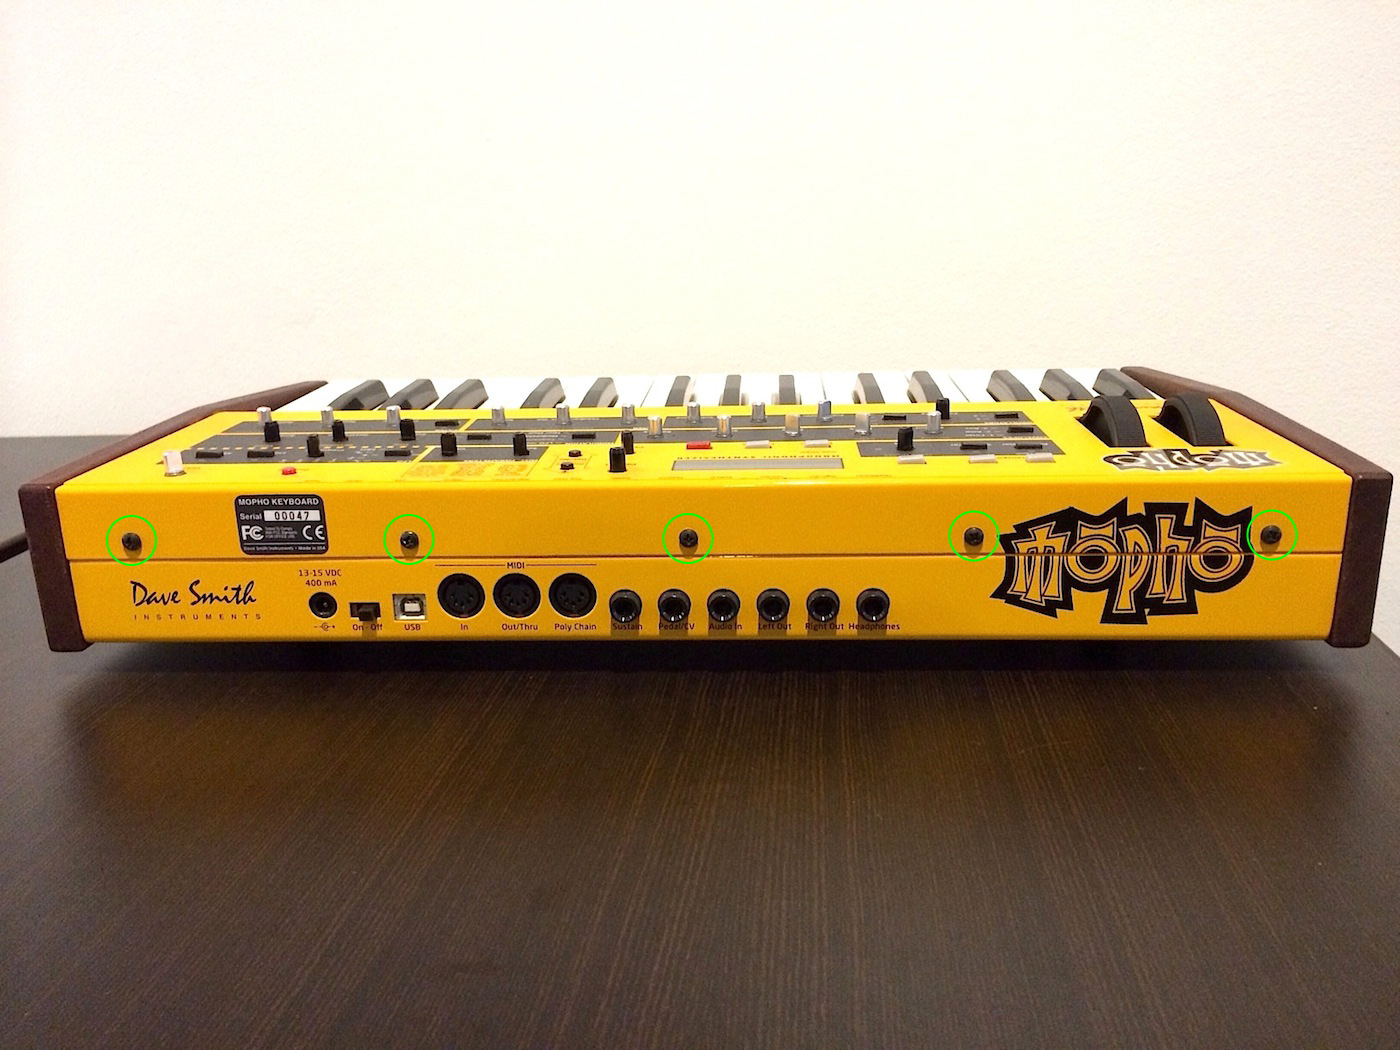
Rear Panel
4. Place a piece of soft material behind the synth (bubble wrap, towel, blanket, etc..).
5. Remove the Mopho Keyboard front panel by lifting up and tilting back. The panel will be still be connected by cables internally, lay it face down on the soft material behind the keyboard.
You will see the main board in the bottom tray of the Mopho Keyboard.
6. Remove the ribbon cable running from the front panel board to the main board. Place your index finger under the base of the ribbon, parallel to its connector and place your thumb on the top of the ribbon’s connector. Rock back and forth with medium force while pulling up to remove the cable.
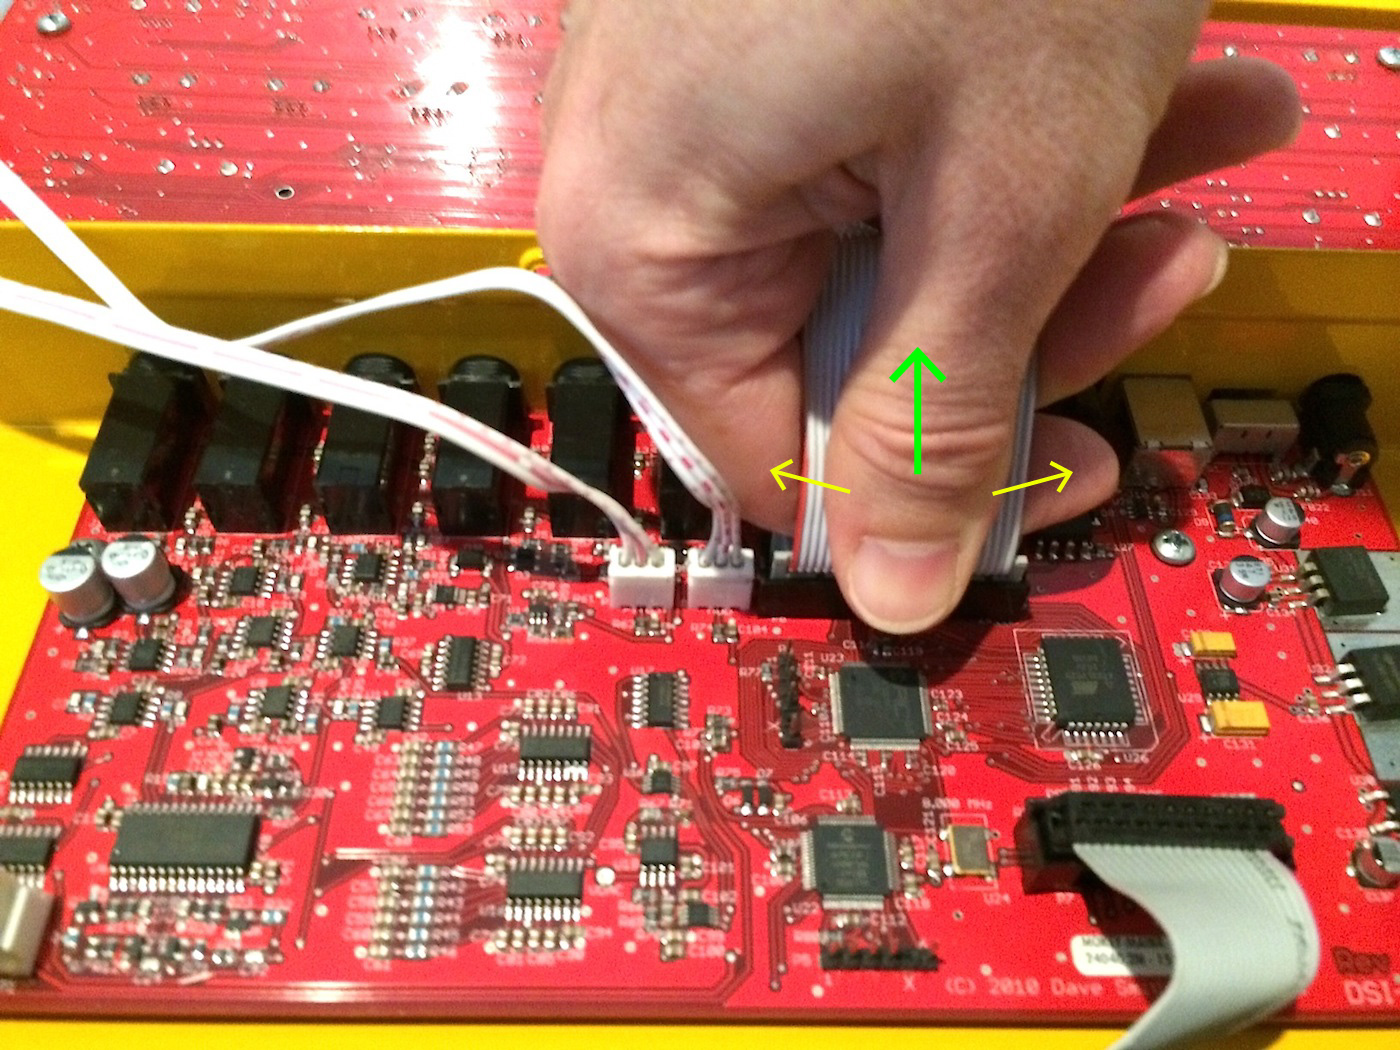
Panel Board Ribbon Cable
7. Remove the two 3-pin white jumper cables running from the Pitch and Mod wheels to the main board. Grab the connectors specifically and pull them straight up with a slight wiggle. DO NOT pull the cables themselves.
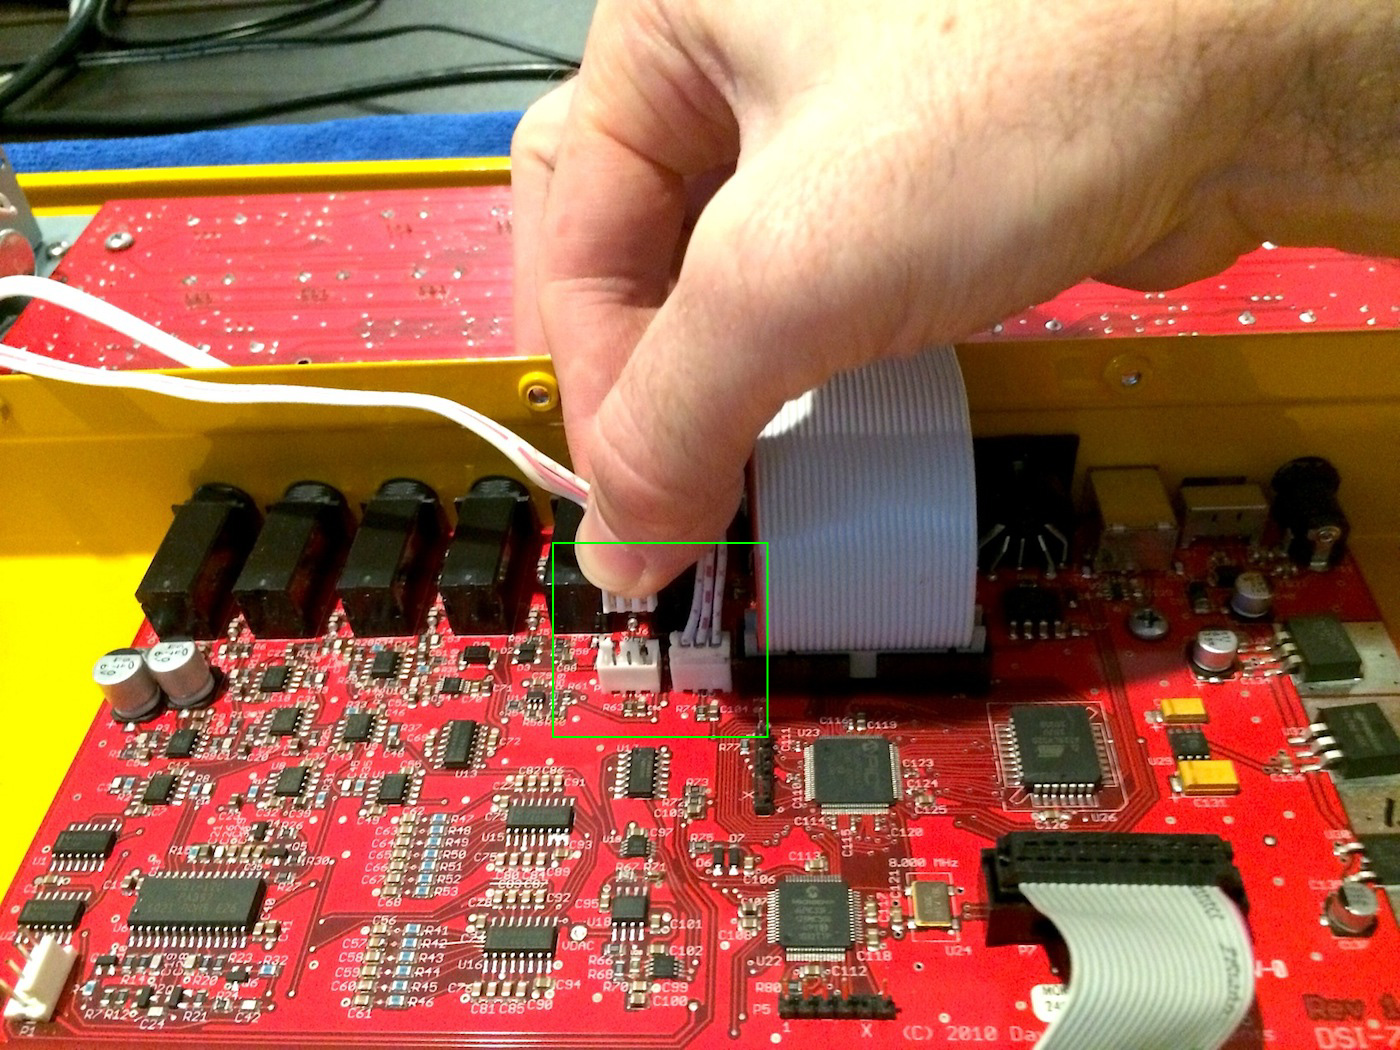
Pitch & Mod Wheel Connectors
The top panel can now be set aside.
Removing the keybed:
1. Remove the ribbon cable running from the keyboard to the main PCB. Place your index finger under the base of the ribbon, parallel to its connector and place your thumb on the top of the ribbon’s connector. Rock back and forth with medium force while pulling up to remove the cable.
Keybed Ribbon Cable
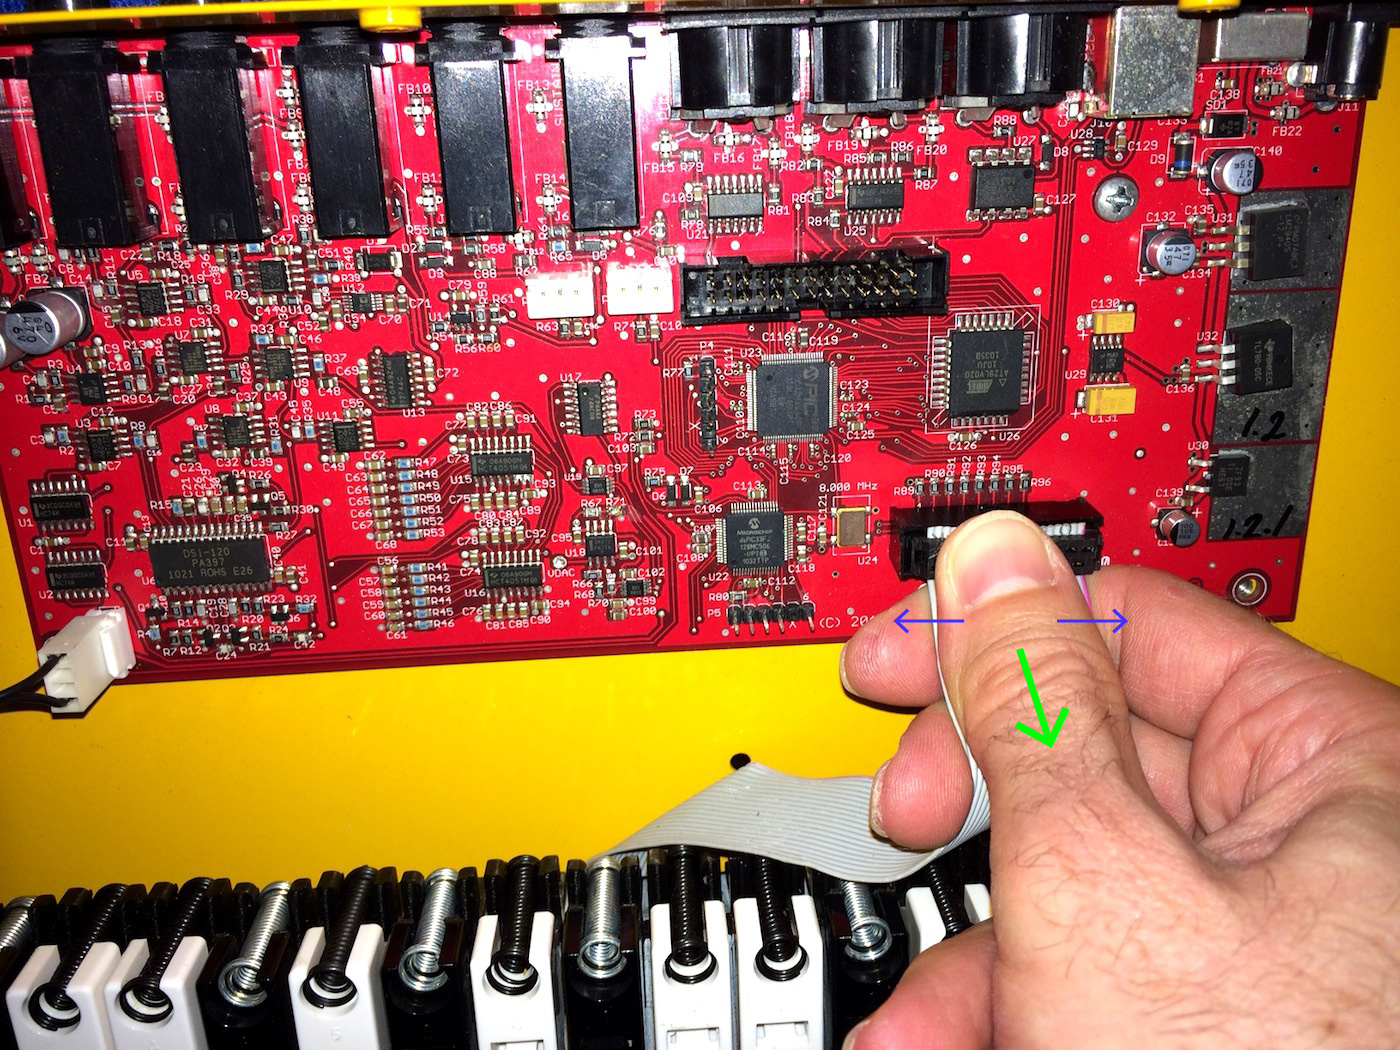
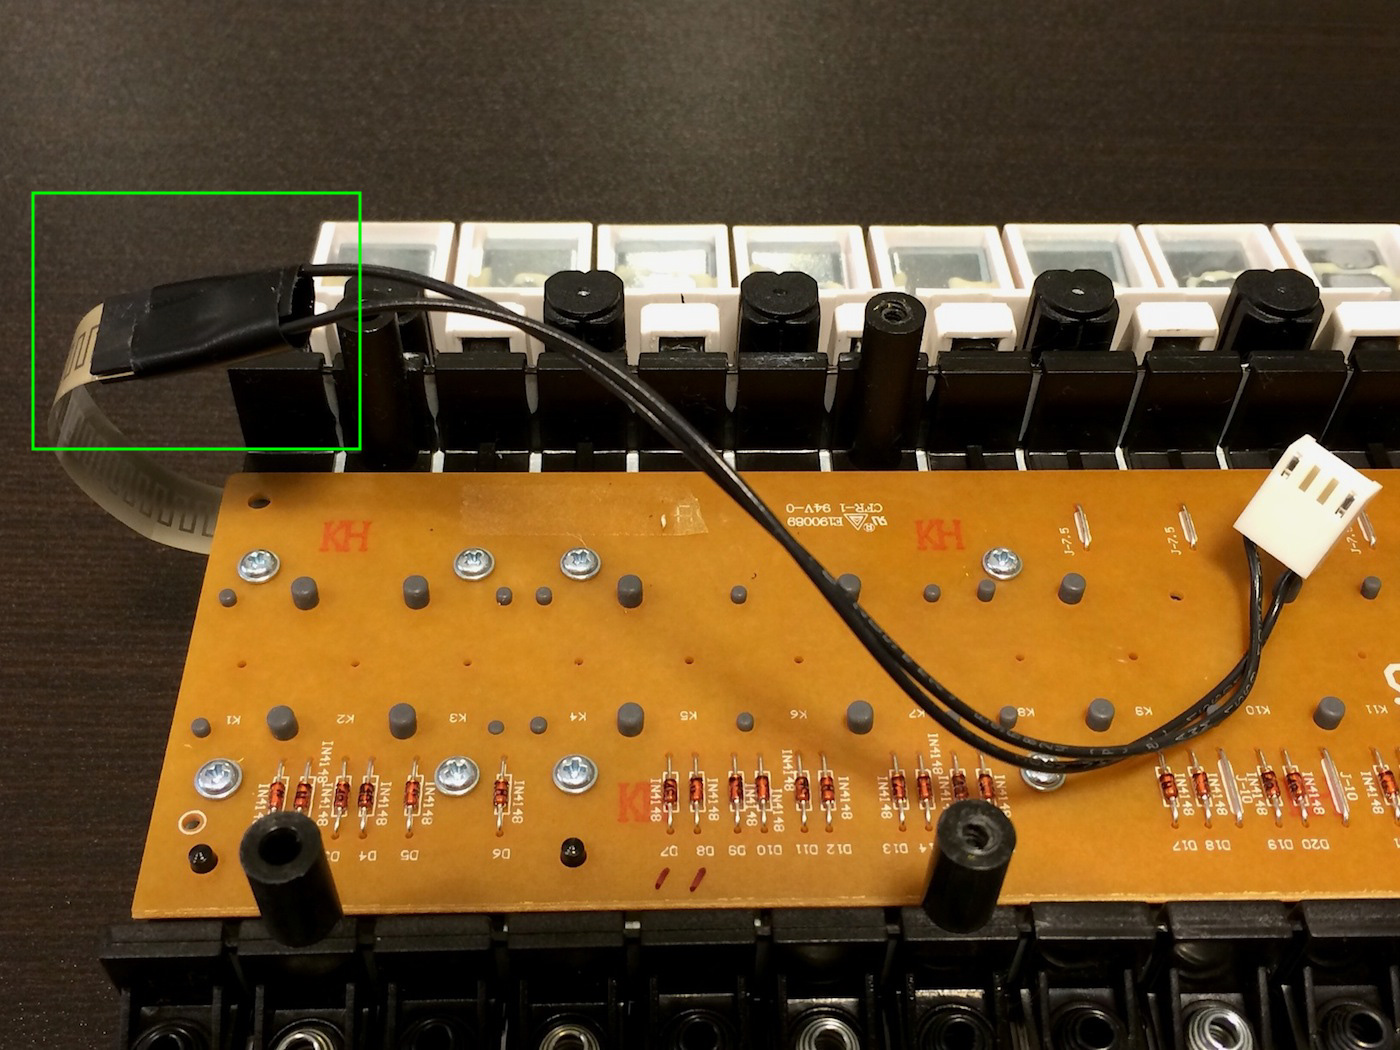
2. Remove the 4-pin jumper running from the keybed’s aftertouch sensor to the main PCB board. It is located in the lower left of the main board. Grab the connector itself and pull straight up with a slight wiggle. DO NOT pull on the wires.
Aftertouch Cable
3. Flip the unit over, face down, and rest the keys on a soft surface.
4. Remove the 6 black screws holding the keybed in from the bottom of the Mopho Keyboard. The screws are aligned in 2 horizontal rows of 3 screws each.
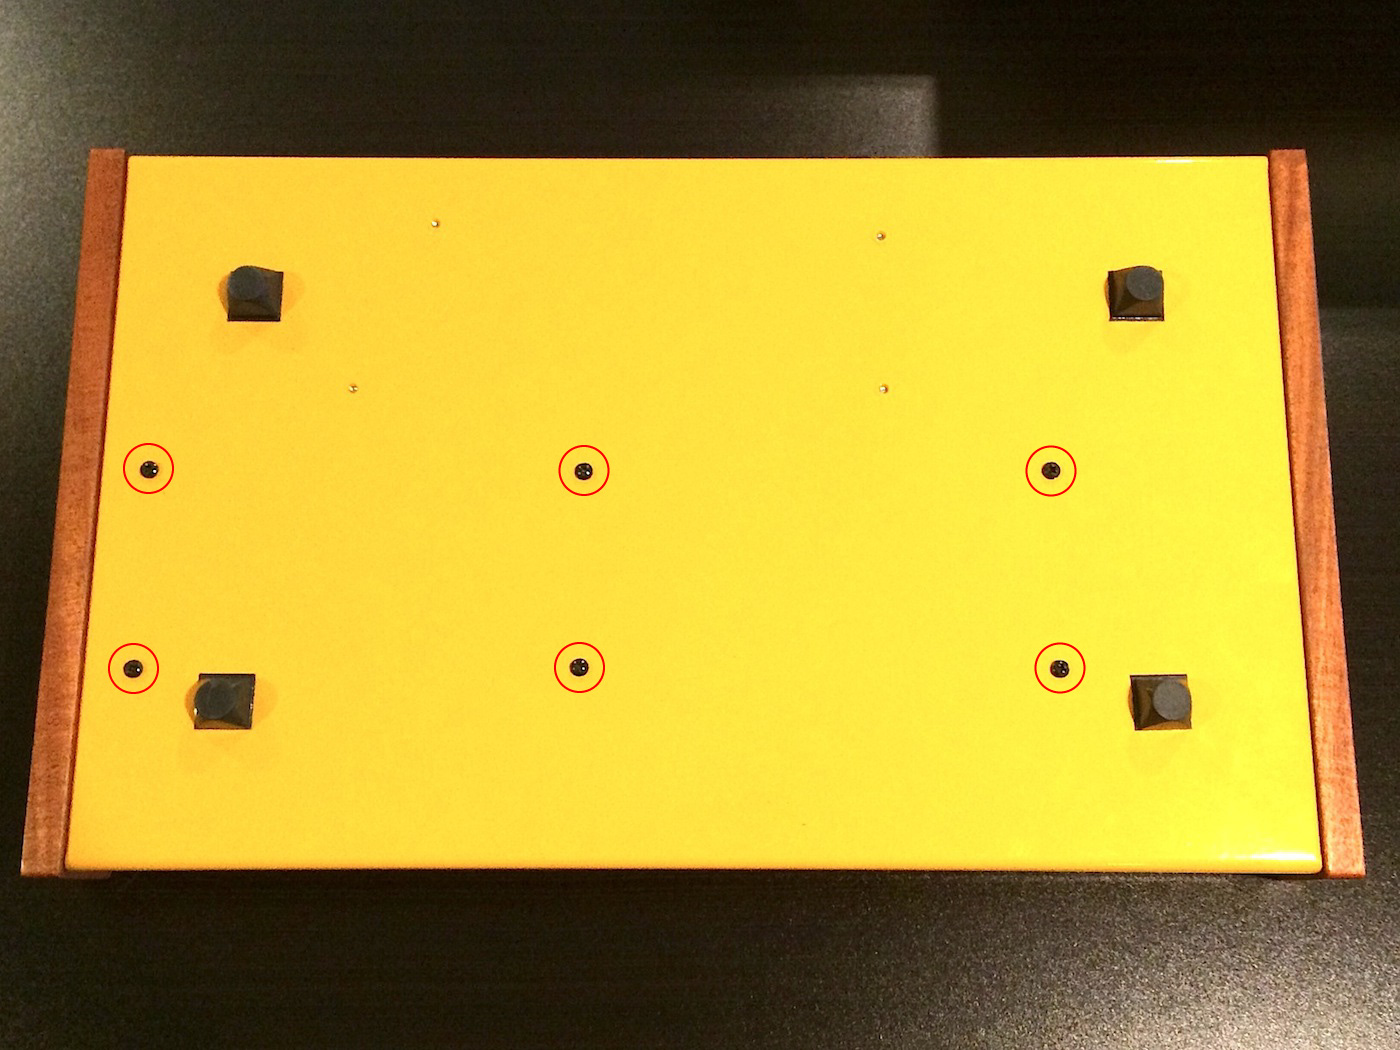
Mopho Bottom
The keybed is now detached. Hold the keybed in place and flip the unit back over. The keybed can now be removed.
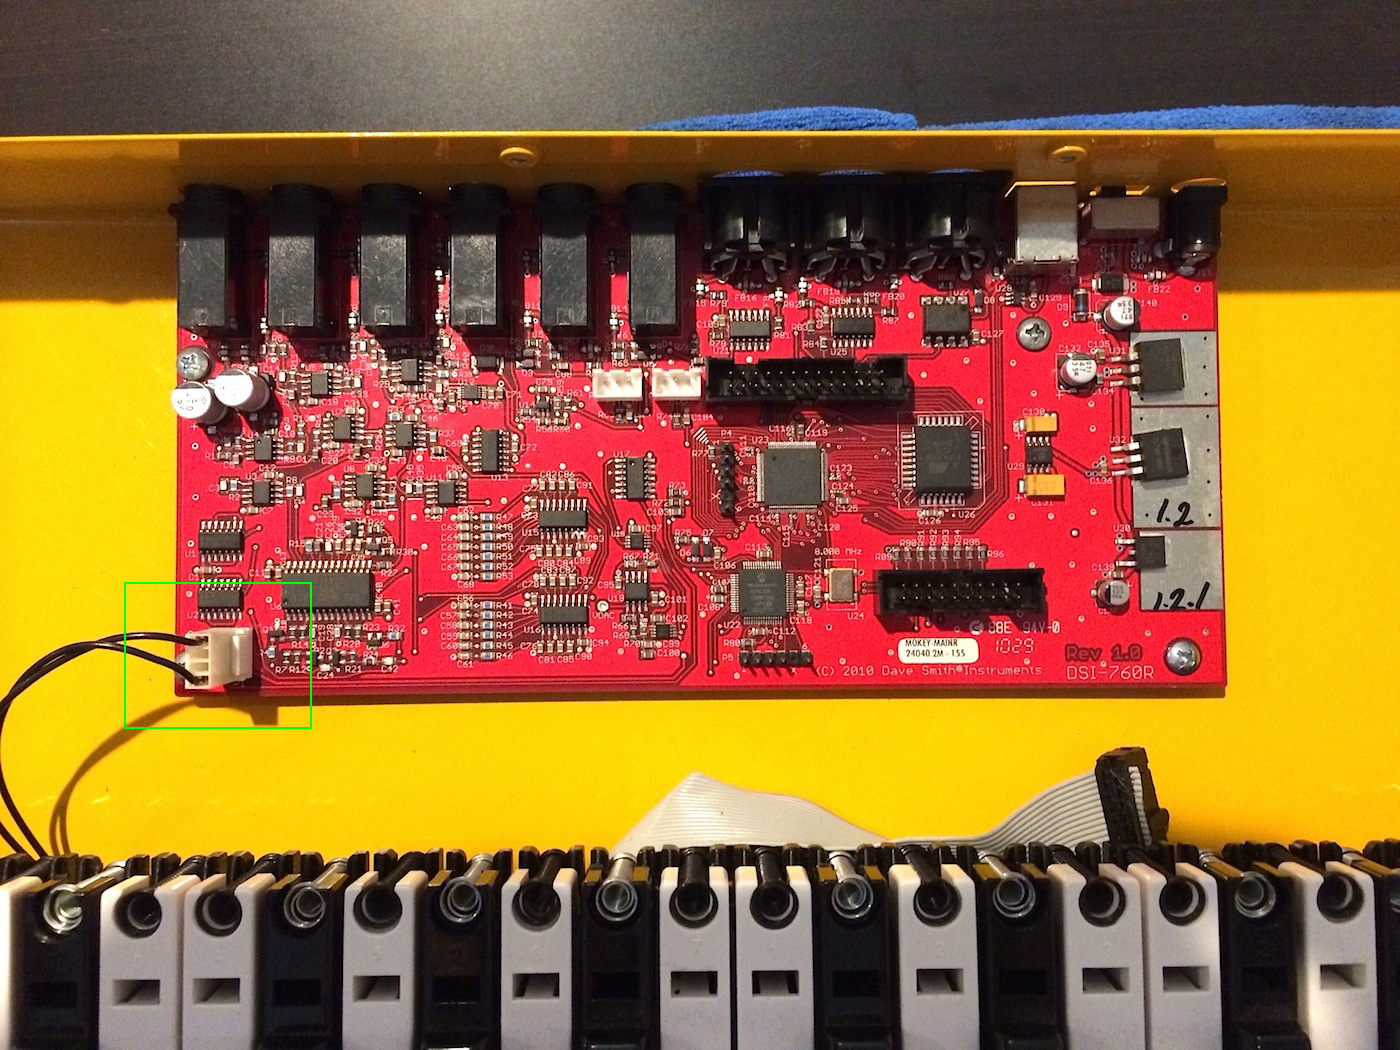
5. If you are replacing the keybed, you may need to transfer the aftertouch sensor’s cable extender to the new keybed. The aftertouch cable is the flat ribbon cable coming out of the left side of the keybed. It has a 2-wire cable extender attached to it, which you unplugged from the main board in step 2 above. The extension connector is wrapped in electrical tape. Simply unwrap the electrical tape and disconnect the cable extender from the old keybed, then attach it to the new keybed in the same fashion.
Aftertouch Cable Extender
6. Reassemble the Mopho Keyboard in the reverse order.
- IMPORTANT: The keybed standoffs are plastic. To avoid over-tightening and stripping standoffs when installing the keybed, DO NOT use an electric or powered screwdriver.
Please contact DSI Technical Support if you have any questions regarding this procedure.